View Console button to open the Project Console in your browser.

Database section on the sidebar of the project console.
Option 1: Creating a Database on the platform
This option allows you to create a new Azure Cosmos DB instance directly within the Zeromagic platform. This is ideal if you don’t have an existing database or prefer a managed solution.-
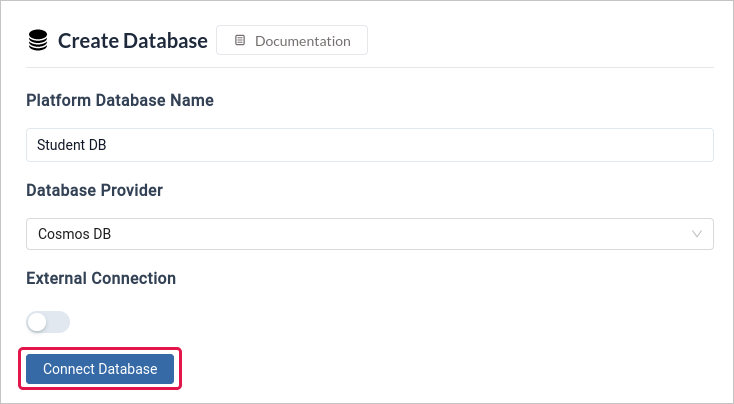
To get started quickly with a database,click
Create Database. - Choose a name for your database to identify it on the platform.
-
Select
Cosmos DBfrom the available database options.
Connect Database to create and connect a new Cosmos database to your Project.
Cosmos DB is available only on shared instances for free tier. You cannot edit the configuration details in free instance.
Option 2: Connecting to an External Database
This option allows you to connect Zeromagic to an already-existing database that is managed somewhere else.The connection details can only be connected to Azure Cosmos DB for NoSQL.
You can create your Cosmos DB by following this tutorial
-
To get started quickly with a database,click
Create Database. - Choose a name for your database to identify it on the platform.
-
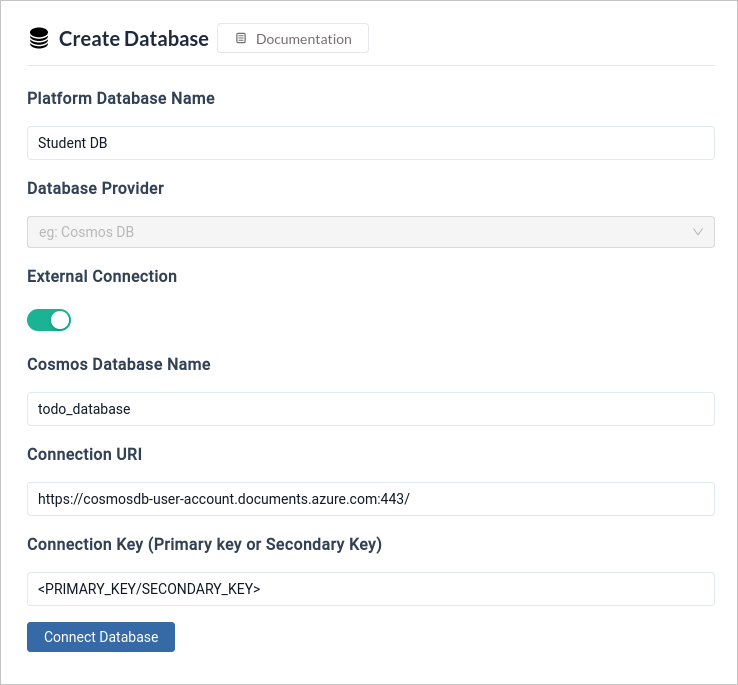
To use an existing database, toggle
External Connection. -
Enter the details of your database connection. Enter your
Cosmos Database name, which is the name you assigned to your database in Azure Cosmos DB.

-
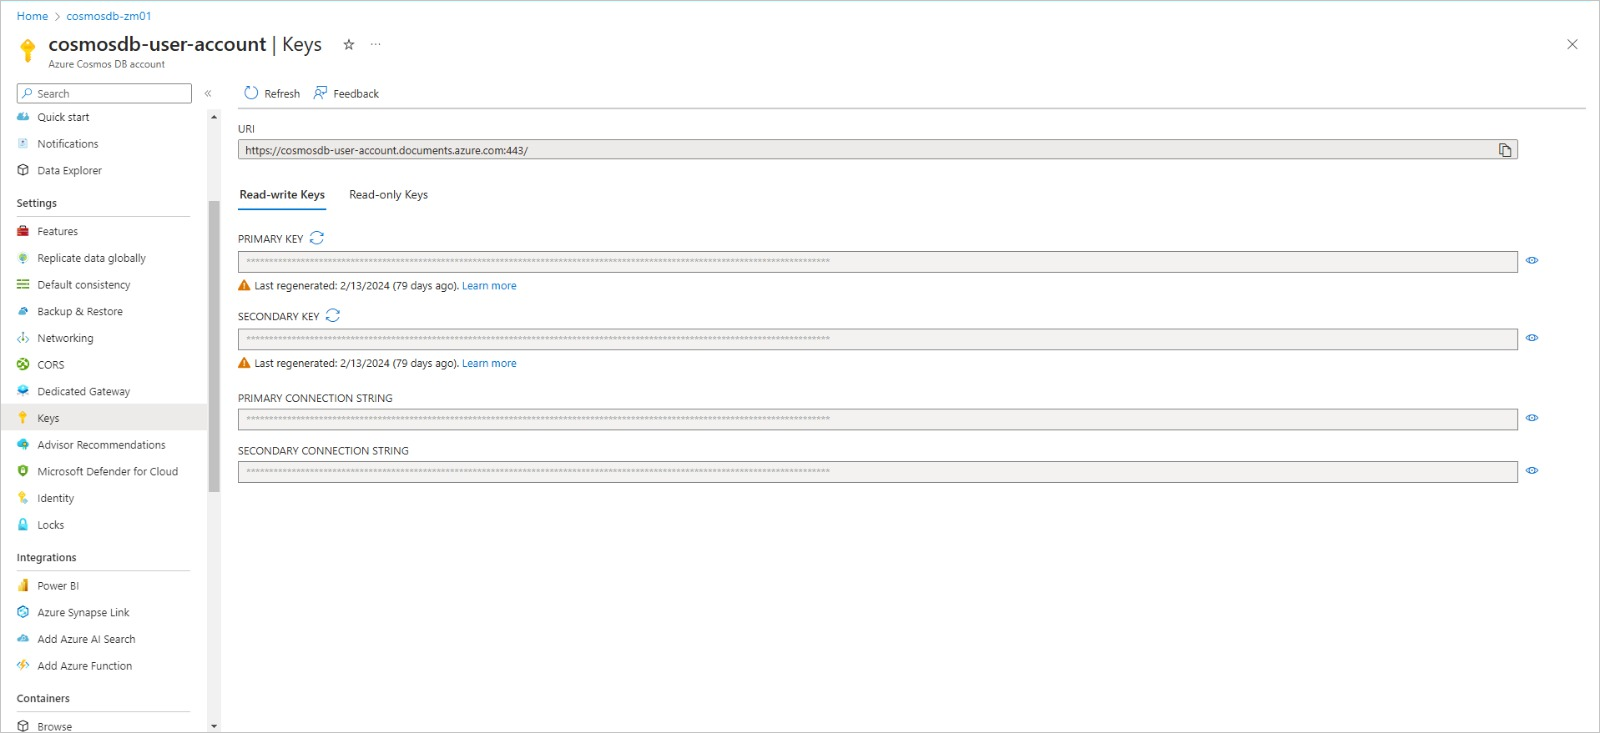
Provide your Azure Cosmos DB
Connection URI. This is a unique string that identifies your database instance and allows secure access. You can find the connection URI within the Azure portal for your Cosmos DB account. -
You have the option to use either the PRIMARY KEY or SECONDARY KEY as your
Connection Keyto connect to your external database.
Connect Database to connect to your existing Cosmos database to your Project.