

Step 1 : Create the Login Page & Dashboard Page using HTML
Create two HTML files,login.html and dashboard.html. The login.html file will contain the login form, and the dashboard.html file will contain the dashboard page which will be redirect on successful login.
login.html
dashboard.html
Step 2 : Setup Authentication in Zeromagic
-
Create and open a new
Projectin the console. Add aDatabaseto the project. You can use the database spinned up by Zeromagic or connect your own database. Here we are using the cosmosdb database provided by Zeromagic. To add a database, click on theCreate Databaseon theDatabasesection button and add your database.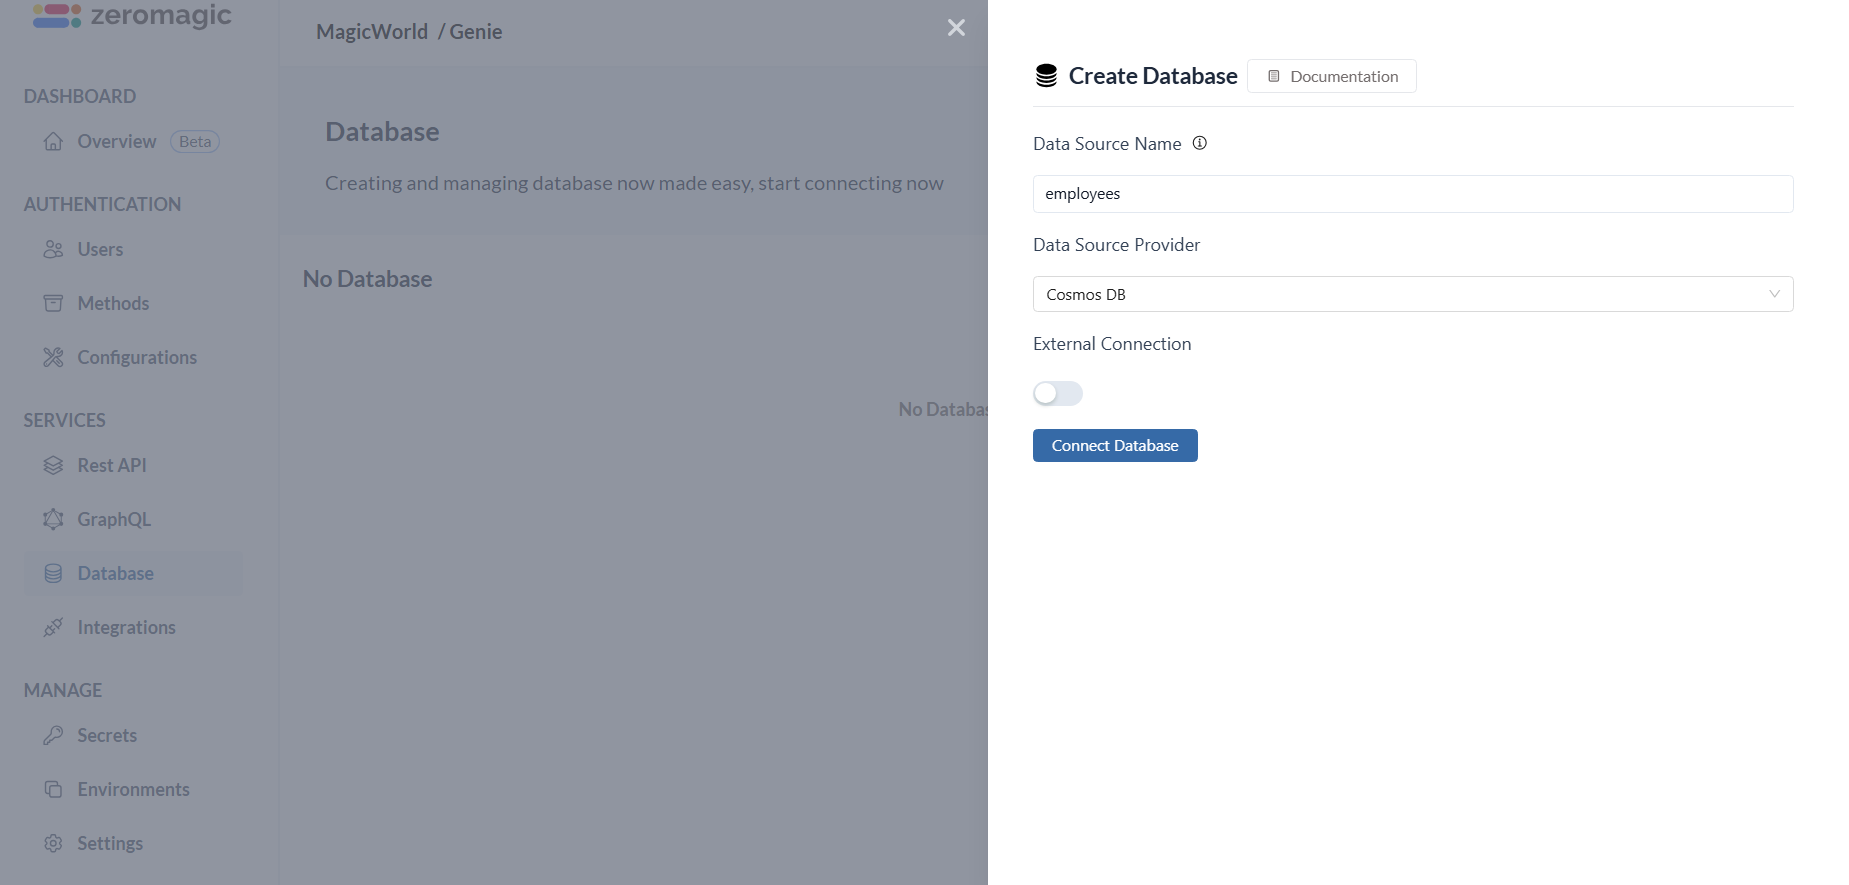
Refer here to know more about: Creating Database on the platform
-
Create a new environment and map the added database to the environment. Here we are using the
developmentenvironment andemployeesdatabase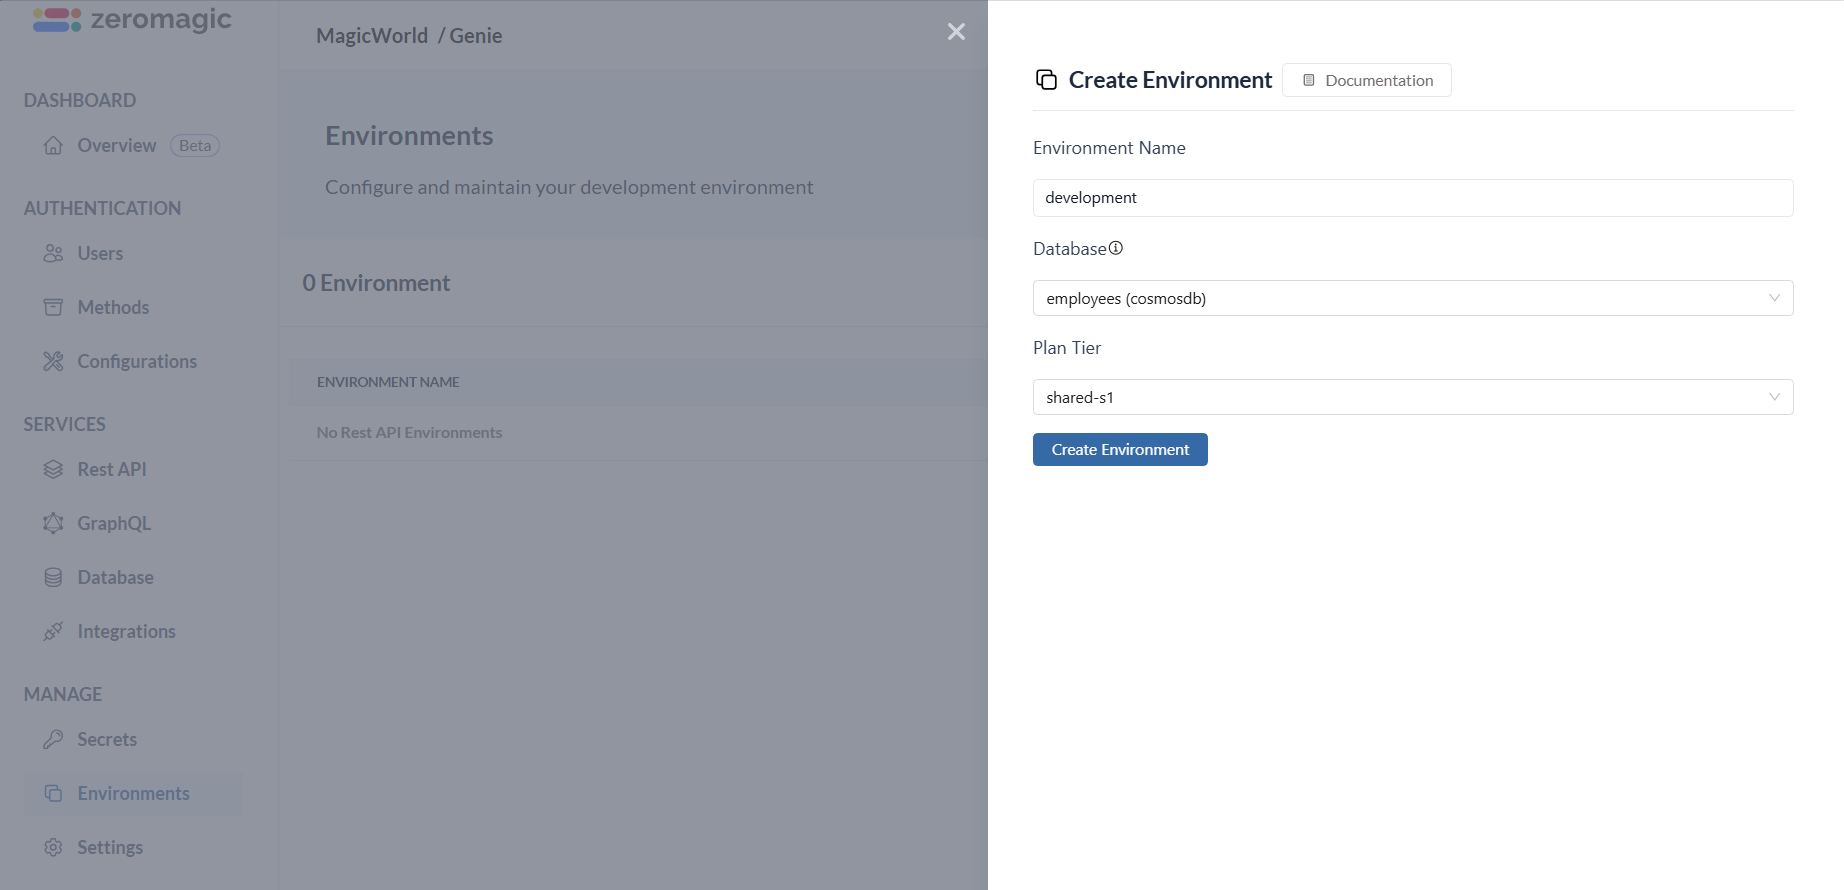
Refer here to know more about: Creating Environments on the platform
-
Add the
Email & Passwordauthentication connection under Methods. ClickAdd Connectionto create a new connection.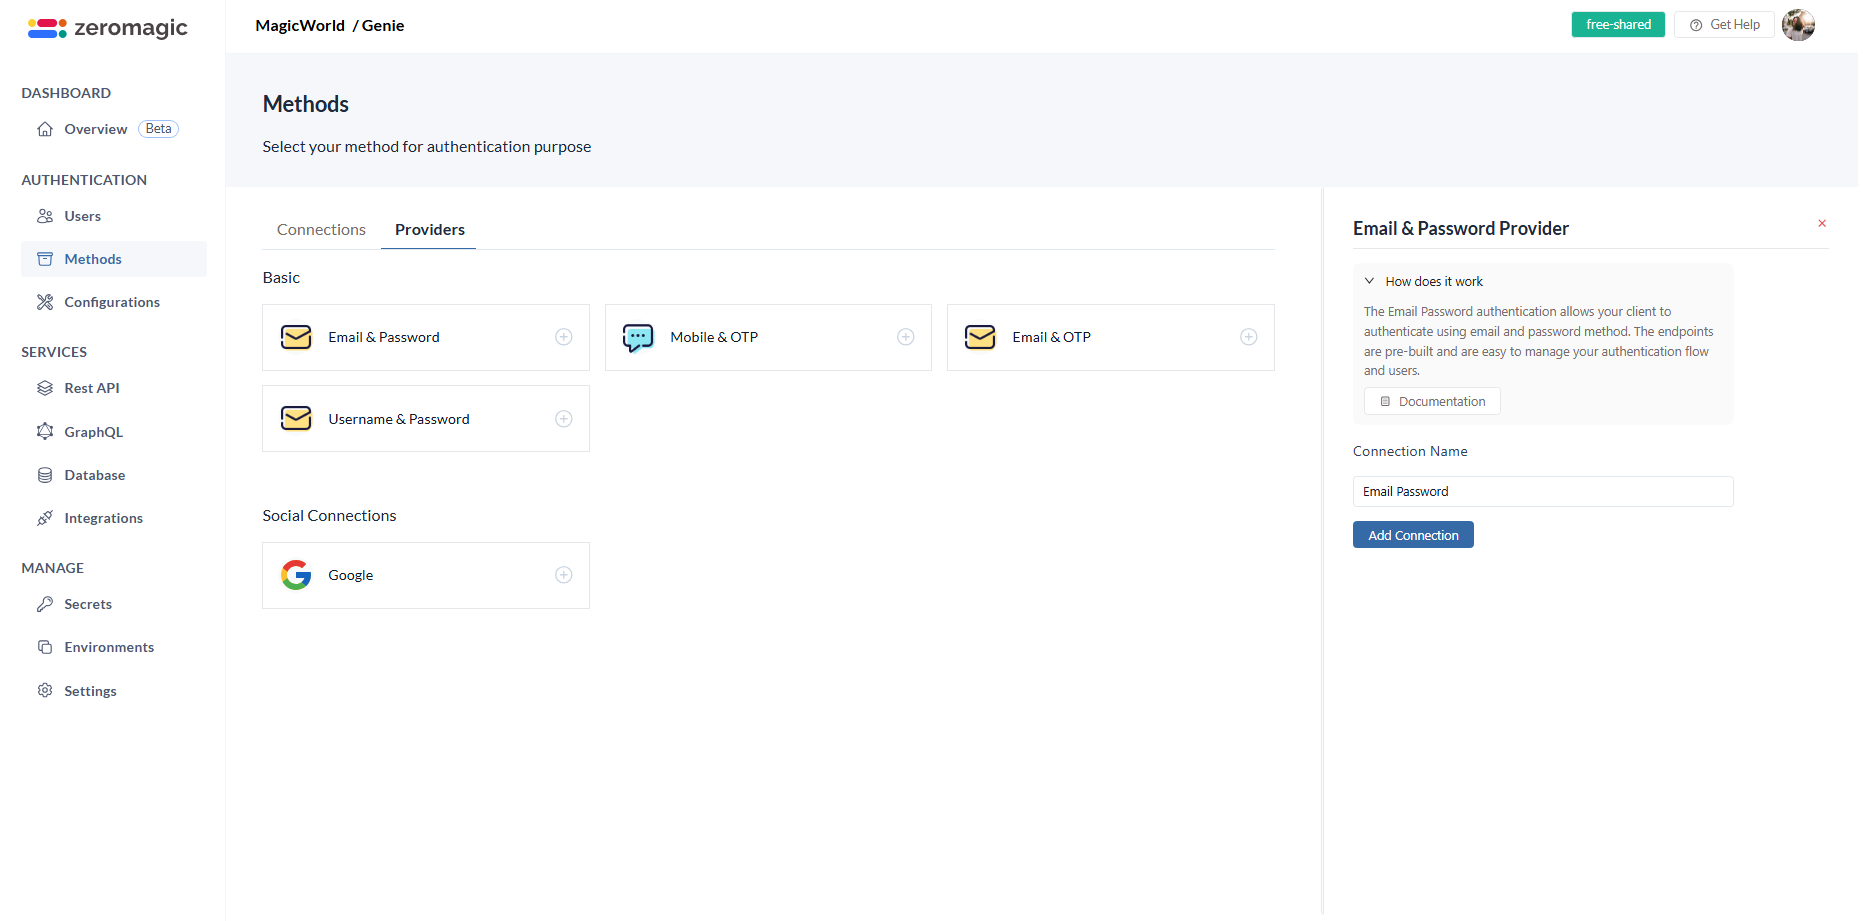
Refer here to know more about: Adding Authentication on the platform
-
Now, go to
Environmentssections and select the environment you created. Copy theAuth Endpoint URLfrom the environment details. This is your authentication endpoint URL where you will be sending the APi requests. Your Auth endpoint URL looks similar to this:Auth Endpoint -
Before making the APi request, let’s create a new user credentials in the database for this example. You can skip this step if your preferring to go with registering the user and login with that user credentials. We do provide endpoints to create a new user also.
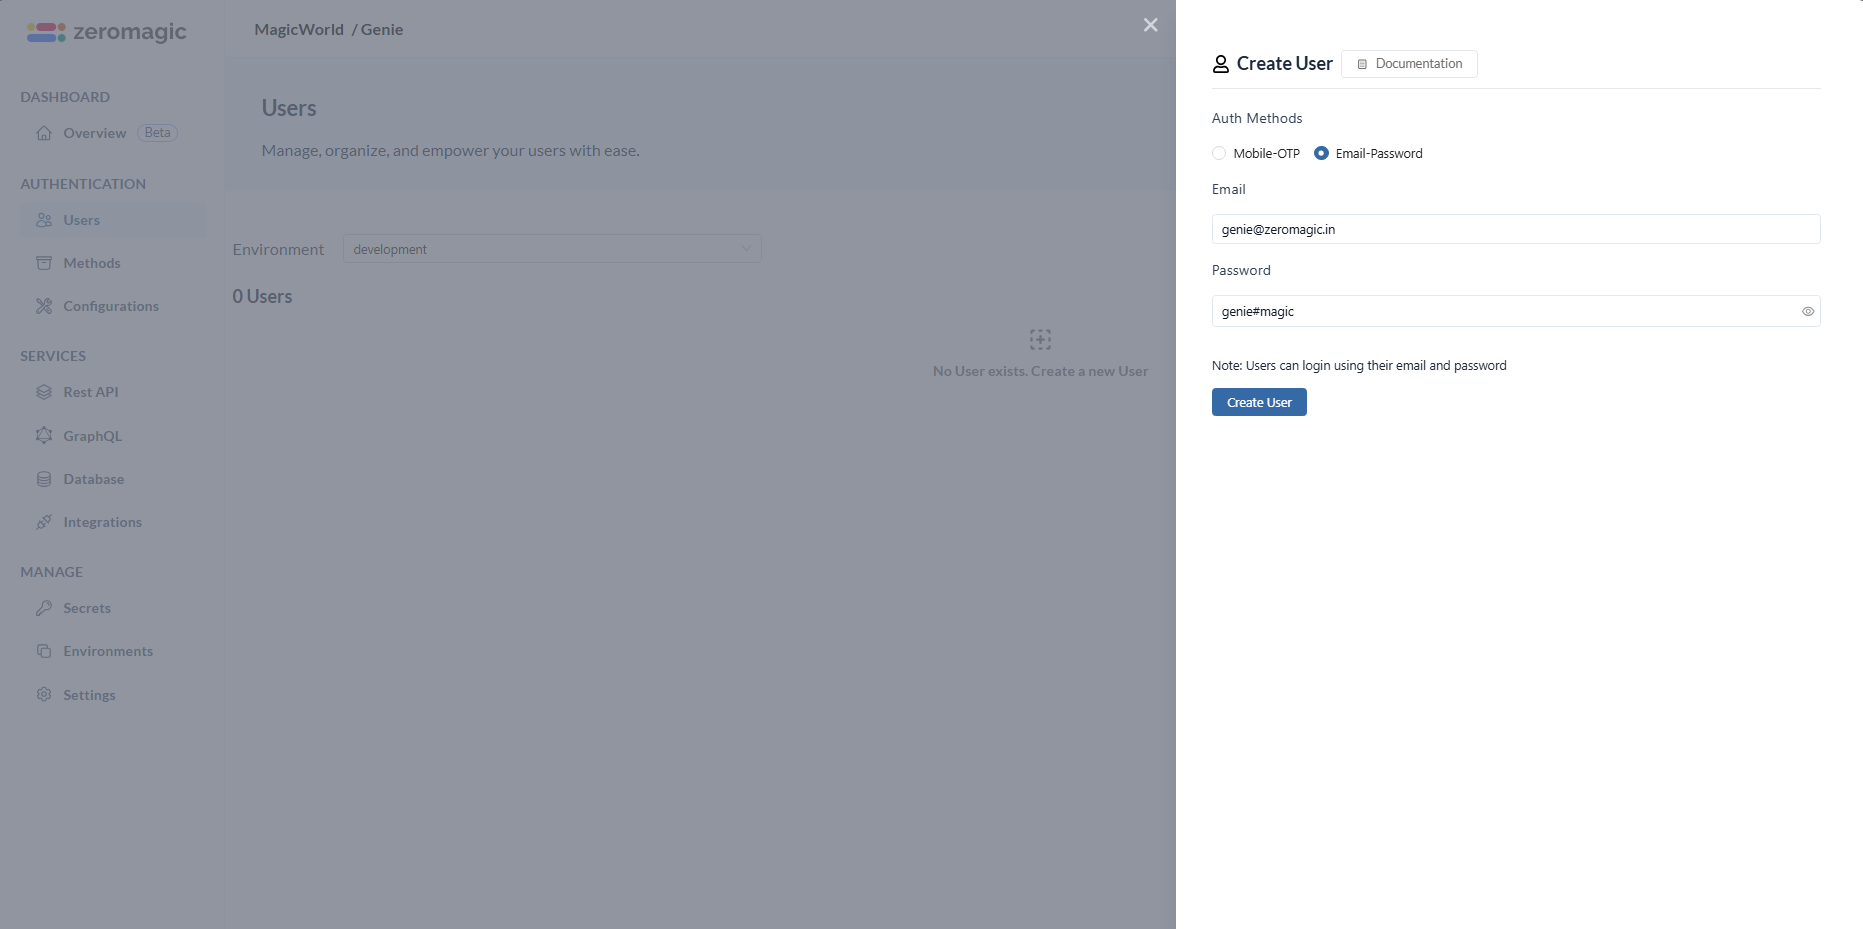
Refer here to know more about: Creating User on the platform
Step 3 : Making the API Request
-
Replace the
{auth_base_url}/{auth_endpoint_path}in thelogin.htmlfile with the copied URL from the environment details and with the path to the email password login endpoint. Here the{auth_base_url}ishttp://authn.zeromagic.cloud/auth/86165f63f34e4be89809c2948c424a99/development/and{auth_endpoint_path}is/email-password-login.Note: Replace the
auth_base_urlith your actual URL. Refer to the Authentication API Reference for more details on the API endpoints. -
Replace the
{your_app_key}with your actualAPP-KEYin the headers oflogin.htmlfile. You can find theAPP-IDandAPP-KEYin theManage -> Settingssection of your console.login.html
Step 4 : Run the Application and Login
- Open the
login.htmlfile in your browser or with your preferred webserver. Enter the email and password of the user you created in the database and click on theLoginbutton. Here login credentials users areSample Credentails - If the login is successful, you will be redirected to the
dashboard.htmlpage. If the login fails, you will see an alert message.