Steps to Connect Your Cosmos DB to Zeromagic
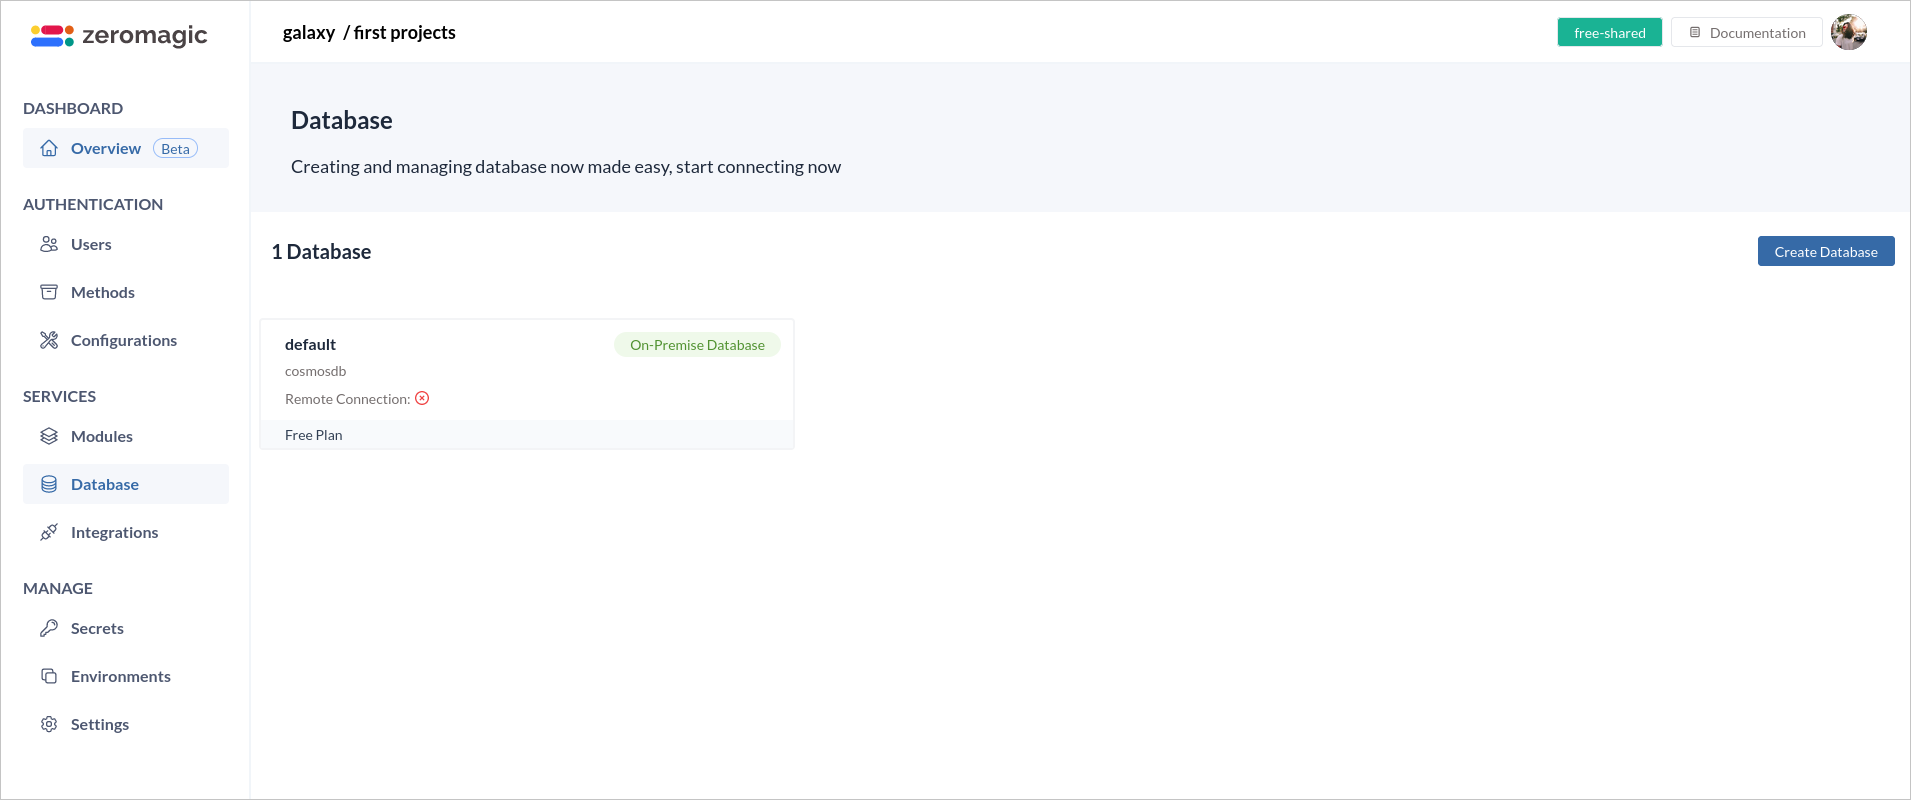
1. Log In and Navigate to Database
- Log in to the Zeromagic Platform.
- Go to your
Project Console. - Navigate to the
Databasesection in the sidebar of the console. - Click on
Create Databaseto start the process of creating a new database.
2. Enter Database Source Information
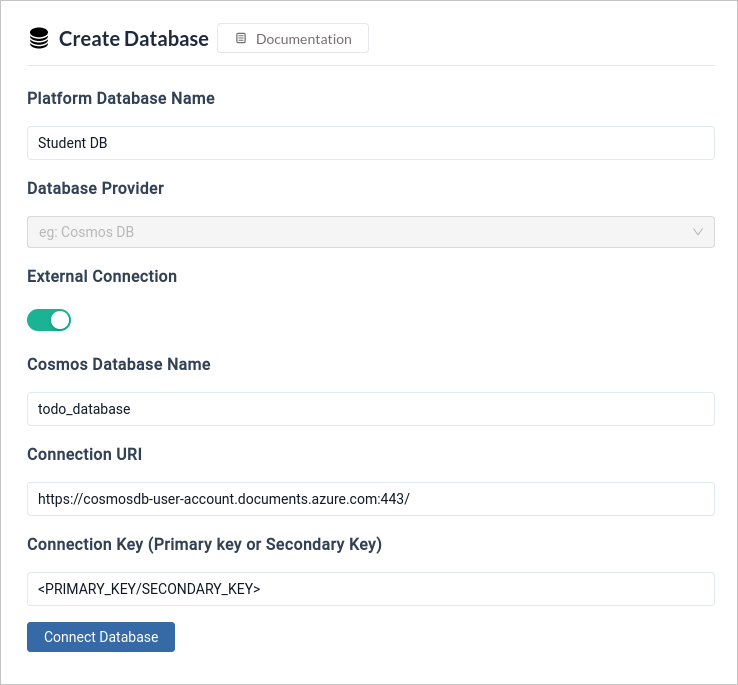
- Provide a
Database Source Nameto help identify your database source on the platform. - Select the appropriate
Database Providerto connect to your database.
3. Toggle External Connection
- Enable the
External Connectionoption to use an external connection for database integration.
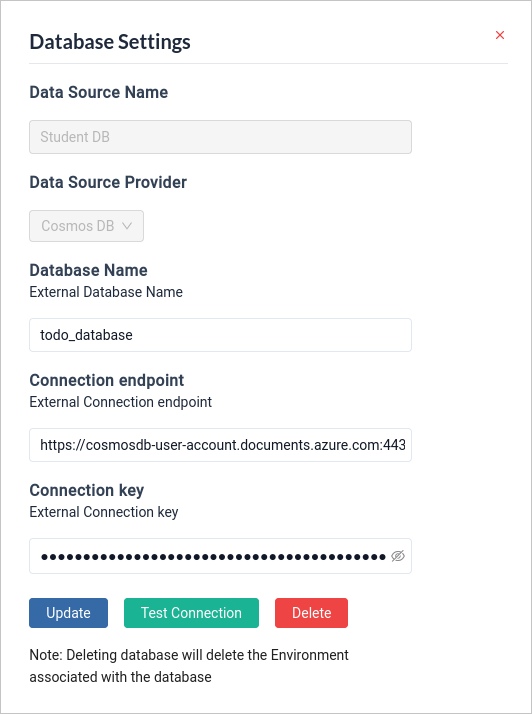
4. Configure Database Connection
- Cosmos Database Name: Enter the exact name you assigned to your Cosmos DB database in Azure.

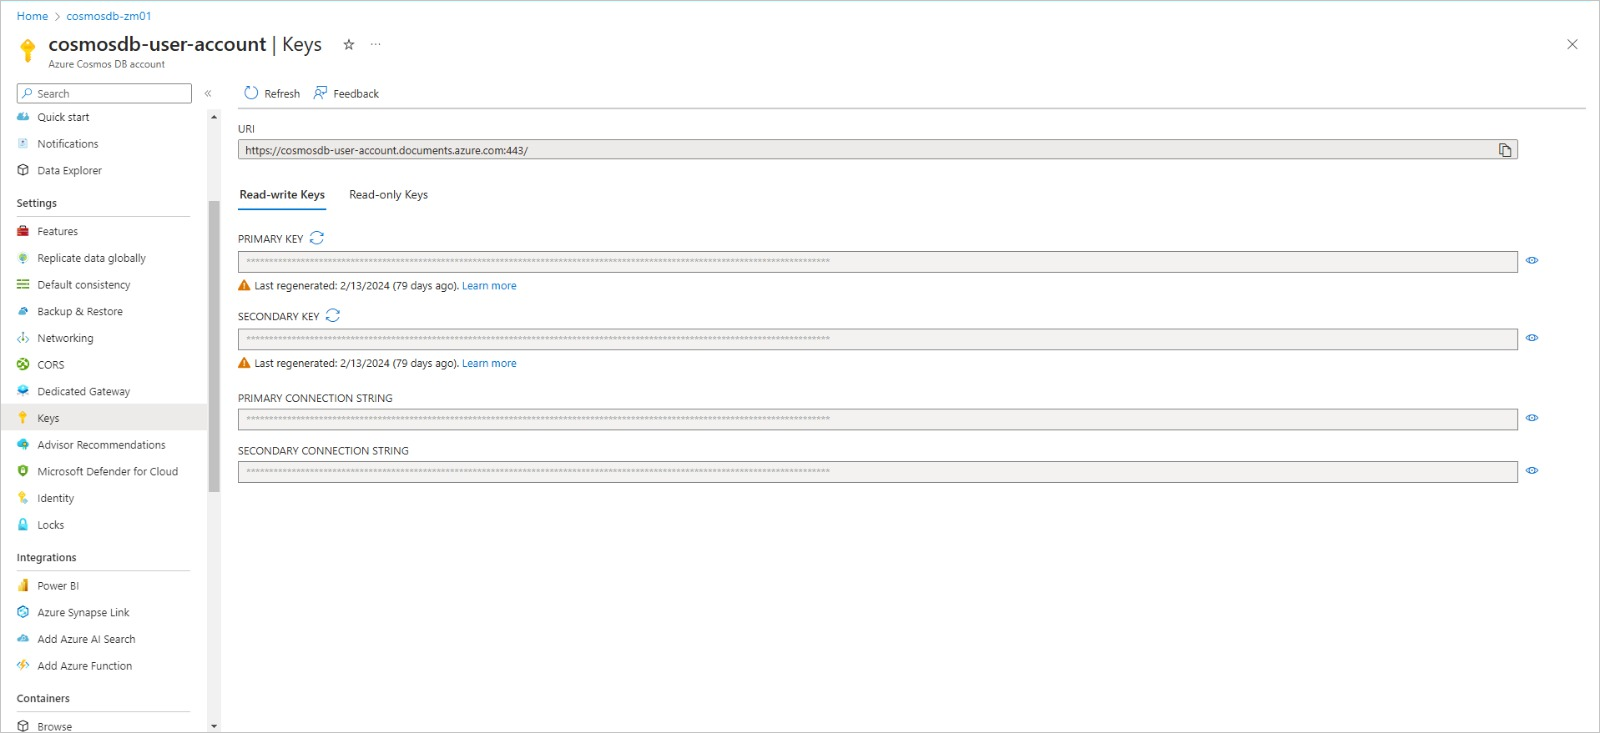
- Connection URI: Locate and provide the unique connection URI for your Cosmos DB account. You can find this string within the Azure portal for your specific Cosmos DB instance. This URI acts as a secure access key.
-
Connection Key: Select either the
PRIMARY KEYorSECONDARY KEYas your connection method to access your Cosmos DB. It’s recommended to use the secondary key for everyday operations and keep the primary key as a backup for critical situations.
5. Connect Database
Click on theConnect Database button to establish the connection between your external Cosmos DB and your Zeromagic project.
6. Test Database Connection
Once you have established the connection, you can test the connection by clicking onTest Connection.
Connection Limitations: This connection method is currently only compatible with Azure Cosmos DB for NoSQL databases.Creating a Cosmos DB: If you don’t have an existing Cosmos DB account, you can follow the official Microsoft tutorial to set one up: https://learn.microsoft.com/en-us/azure/cosmos-db/try-free