Step 1 : Get Google OAuth Client ID and Client Secret
-
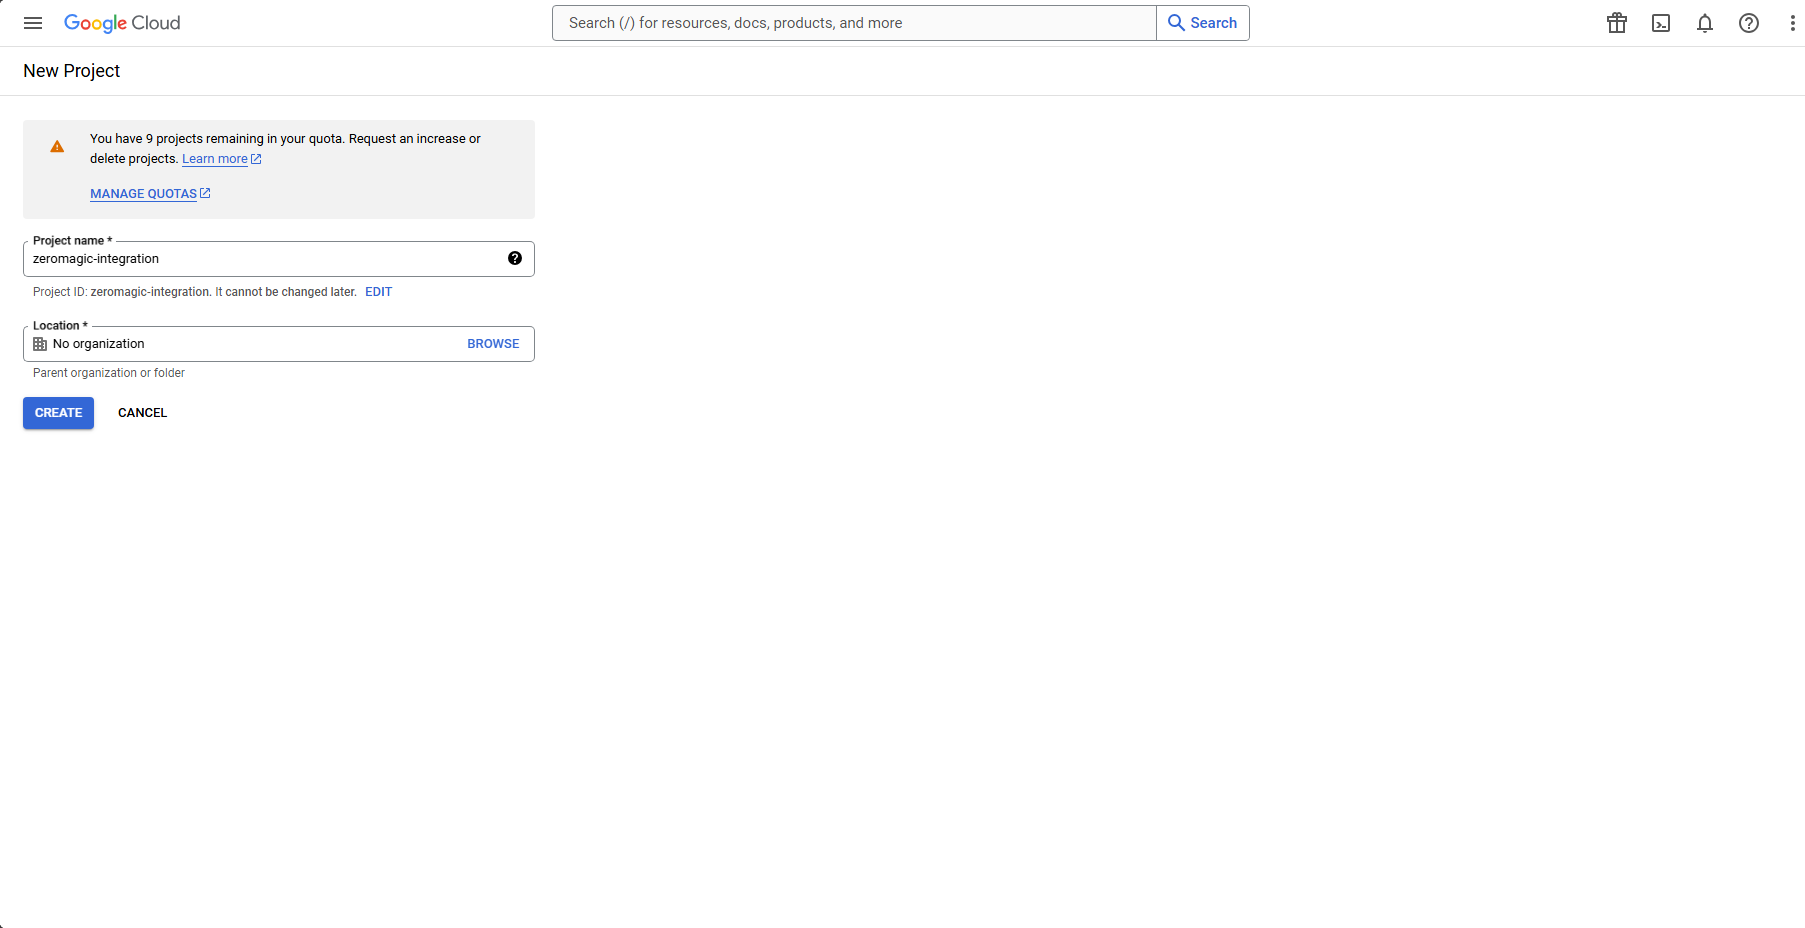
Go to the Google Developers Console and Create a new project.
-
Click on the project name and then select
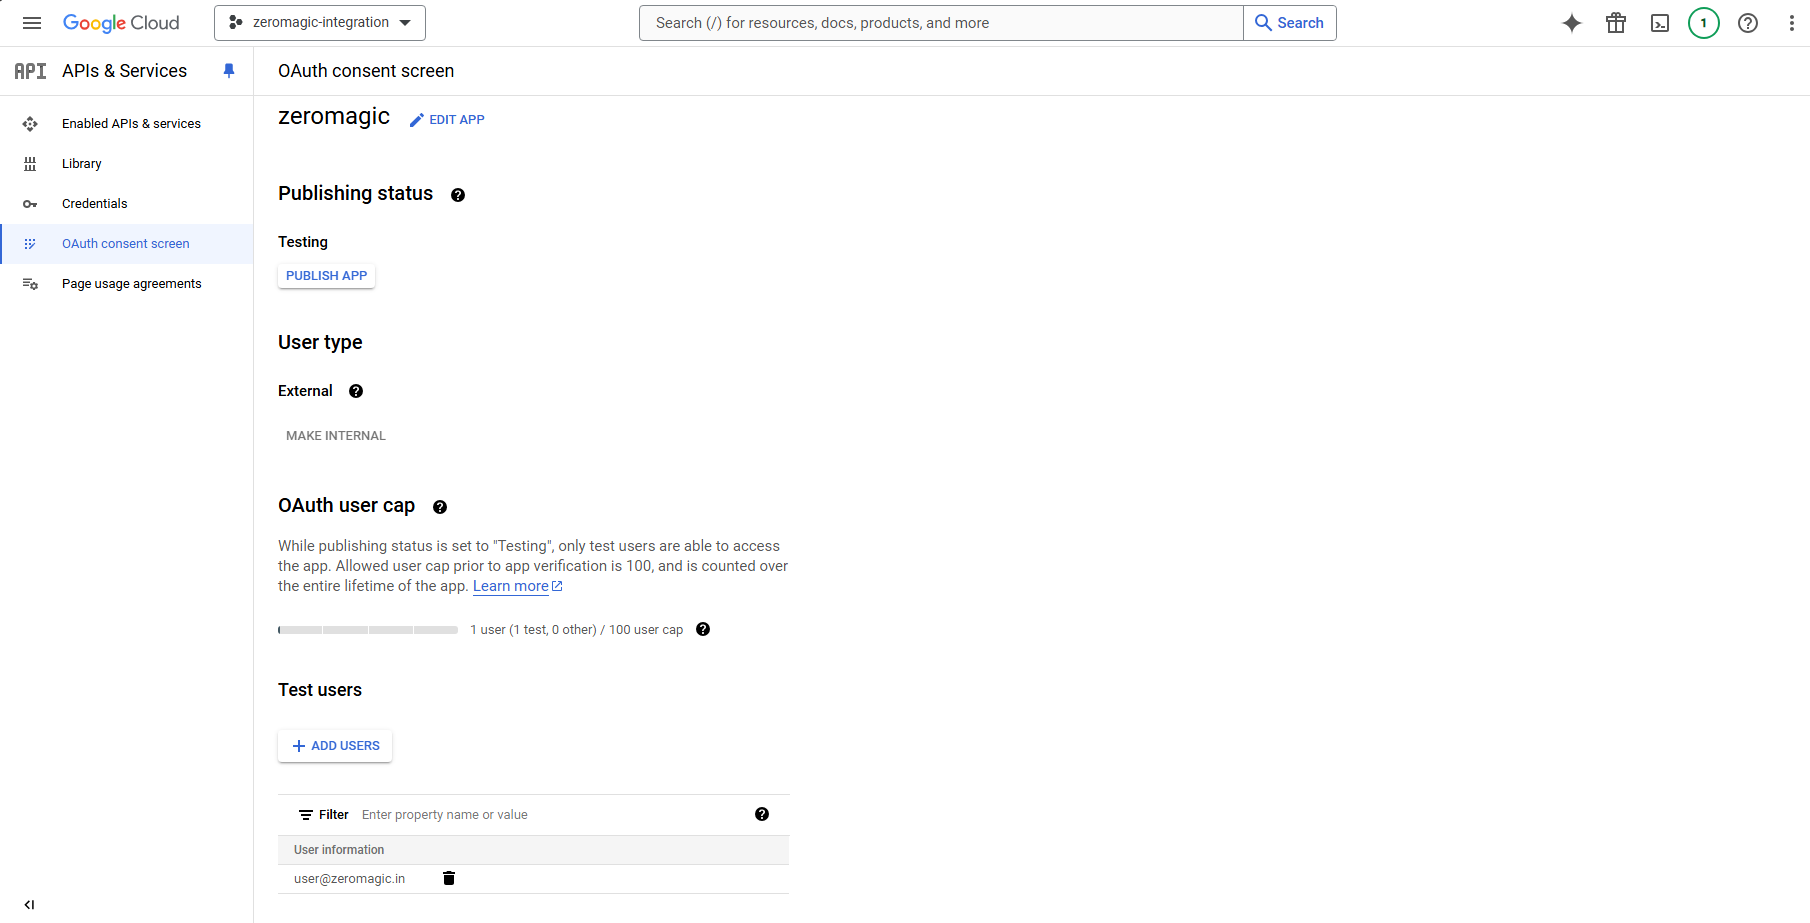
APIs & Serviceson your left sidebar tab. Click onOAuth consent screenand fill in the required details. IMPORTANTTest users: While your app is in development, you can add test users to your OAuth consent screen. These users will be able to sign in to your app with their Google accounts without needing to verify their identity. You can add test users by clicking on the
Add usersbutton in the OAuth consent screen configuration page.You will need to verify and move your app to production before it can be used by anyone other than the test users you have added.
-
Click on
Credentialson your left sidebar tab and then click onCreate Credentialsand selectOAuth client ID. SERVER CONFIGURATIONSReactJS - http://localhost:3000
We are using
Oauth Callback or Authorized Redirect URI - https://authn.zeromagic.cloud/oauth/callback/http://localhost:3000as the ReactJS application URL for this tutorial in Authorized origins. You can replace it with your actual ReactJS application URL when rolling out to production. Example:https://your-reactjs-app.com -
Copy the
Client IDandClient Secretand we will use this to setup our authentication in the zeromagic platform.
Step-2 : Setup Google OAuth in Zeromagic
-
Create and open a new
Projectin the console. Add aDatabaseto the project. You can use the database spinned up by Zeromagic or connect your own database. Here we are using the cosmosdb database provided by Zeromagic. To add a database, click on theCreate Databaseon theDatabasesection button and add your database.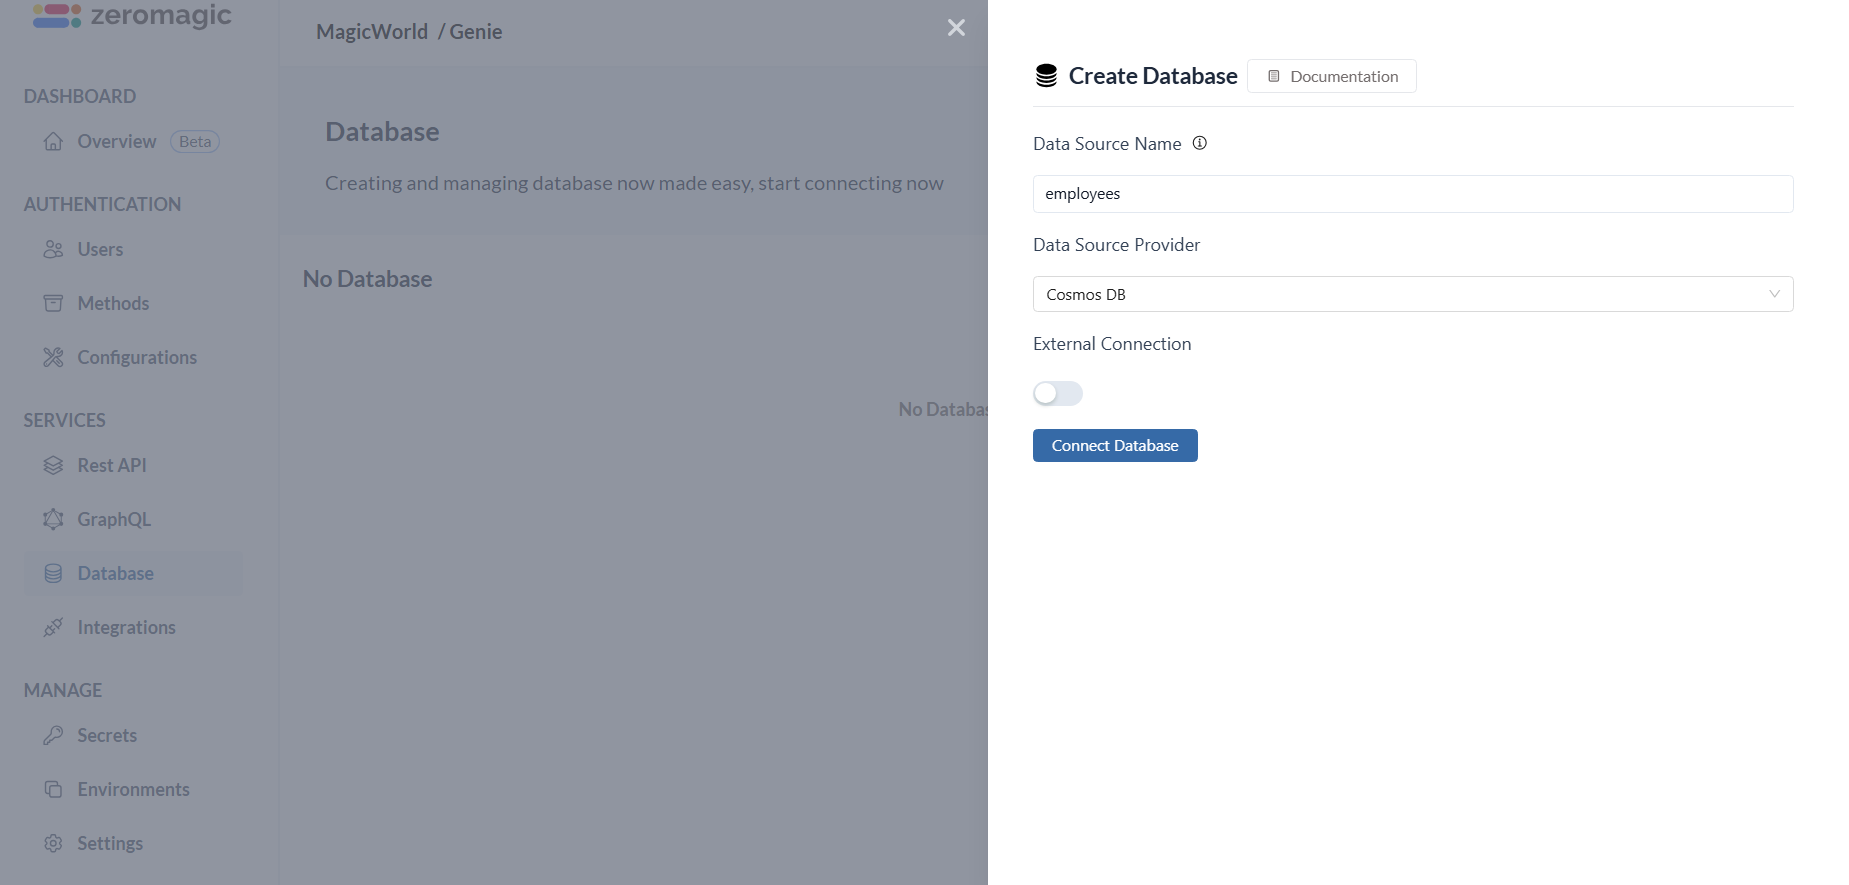
Refer here to know more about: Creating Database on the platform
-
Create a new environment and map the added database to the environment. Here we are using the
developmentenvironment andemployeesdatabase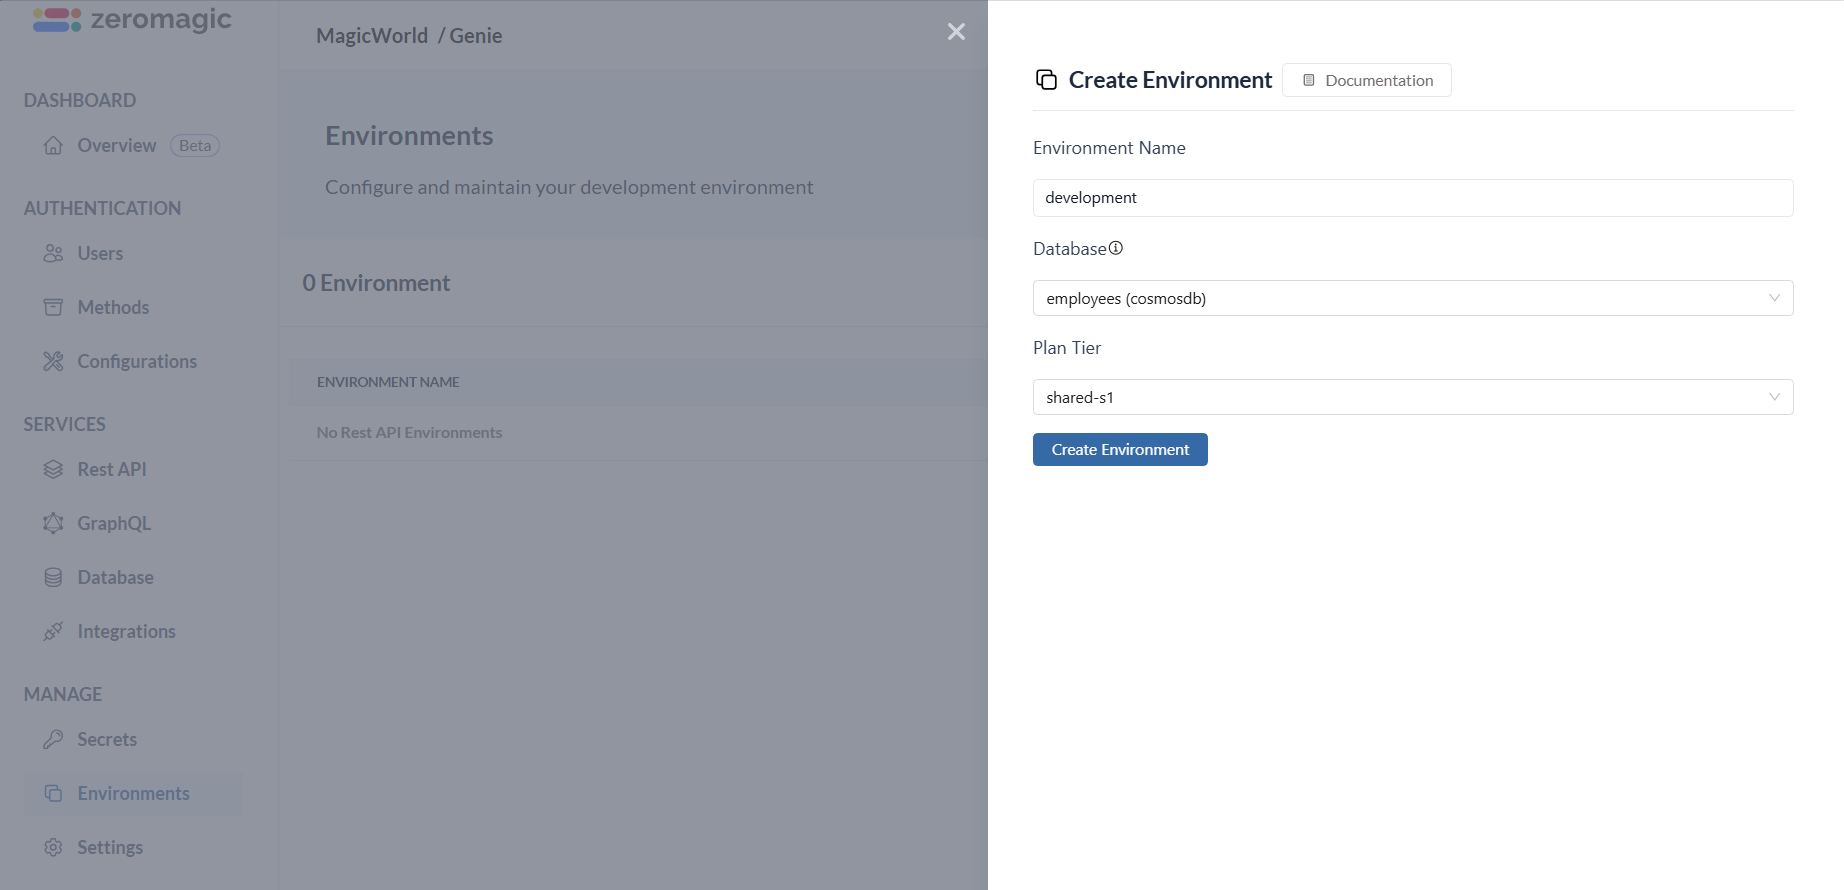
Refer here to know more about: Creating Environments on the platform
-
Add the
Googleauthentication connection under Methods. ClickAdd Connectionto create a new connection with theClient IDandClient Secretyou copied from the Google Developers Console.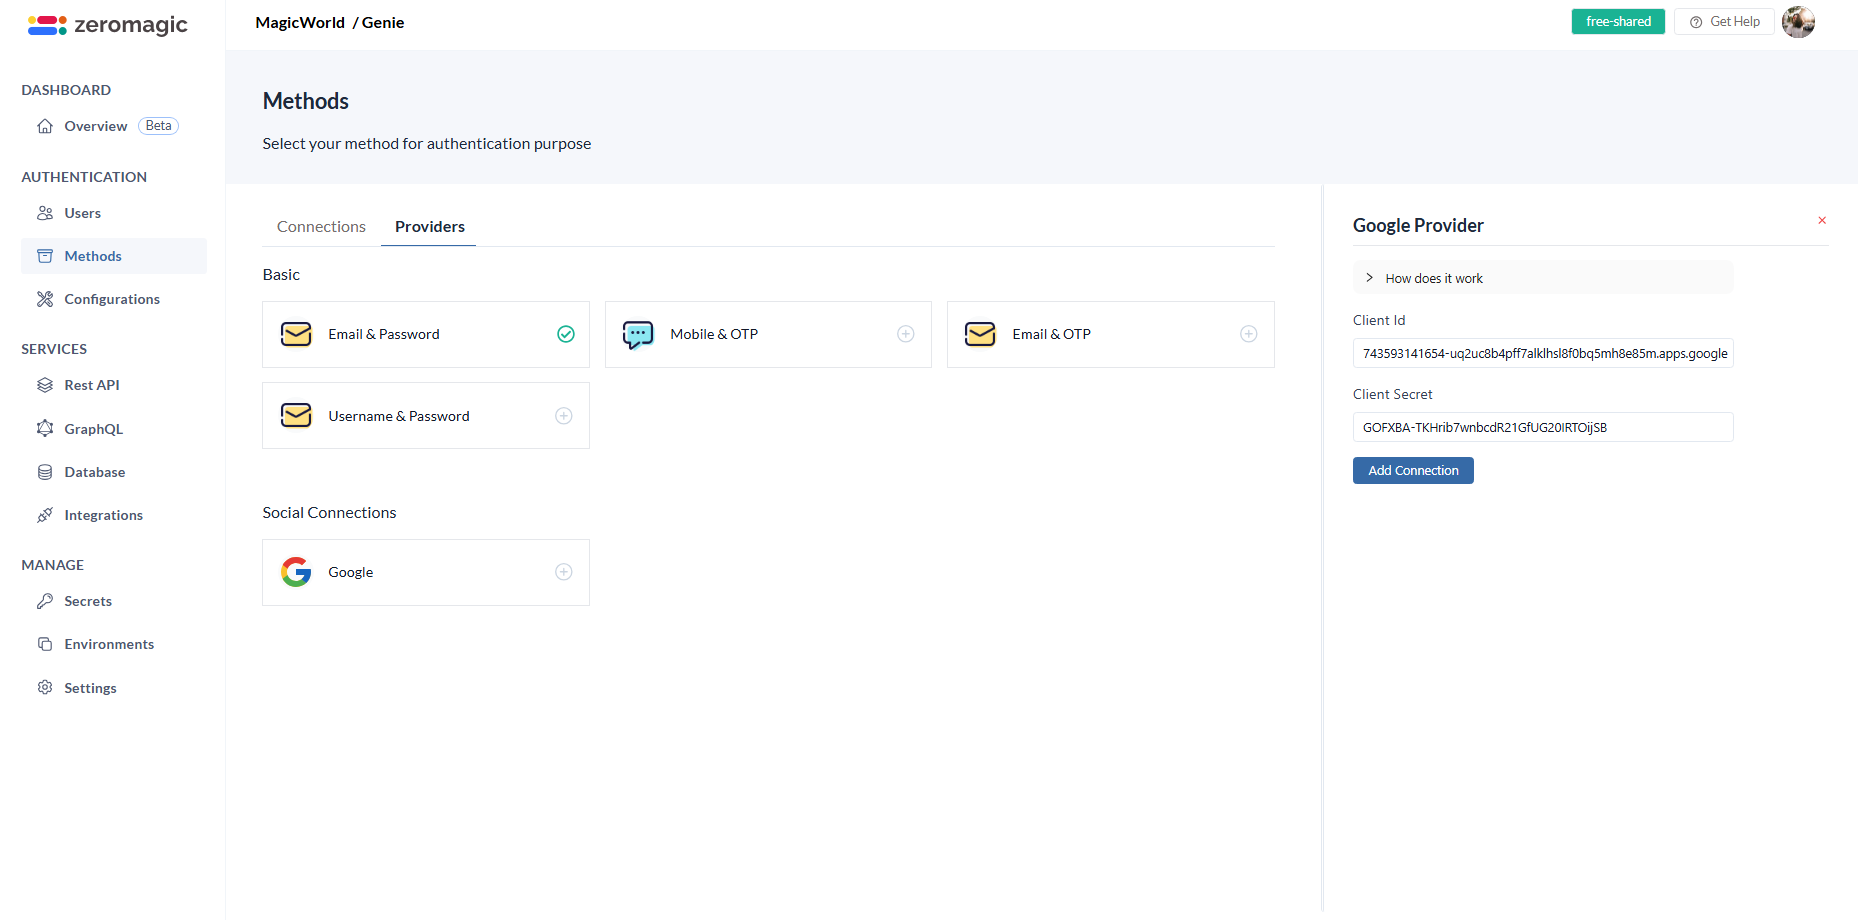
Refer here to know more about: Adding Authentication on the platform
-
Go to
Settingssection in the dashboard and the Redirect URL. Here the redirect URL ishttp://localhost:3000/dashboardas we are using the local ReactJS application URL for this tutorial. You can replace it with your actual ReactJS application URL when rolling out to production. Example:https://your-reactjs-app.com. This is the url where the user data response with be appended to the query params after successful authentication.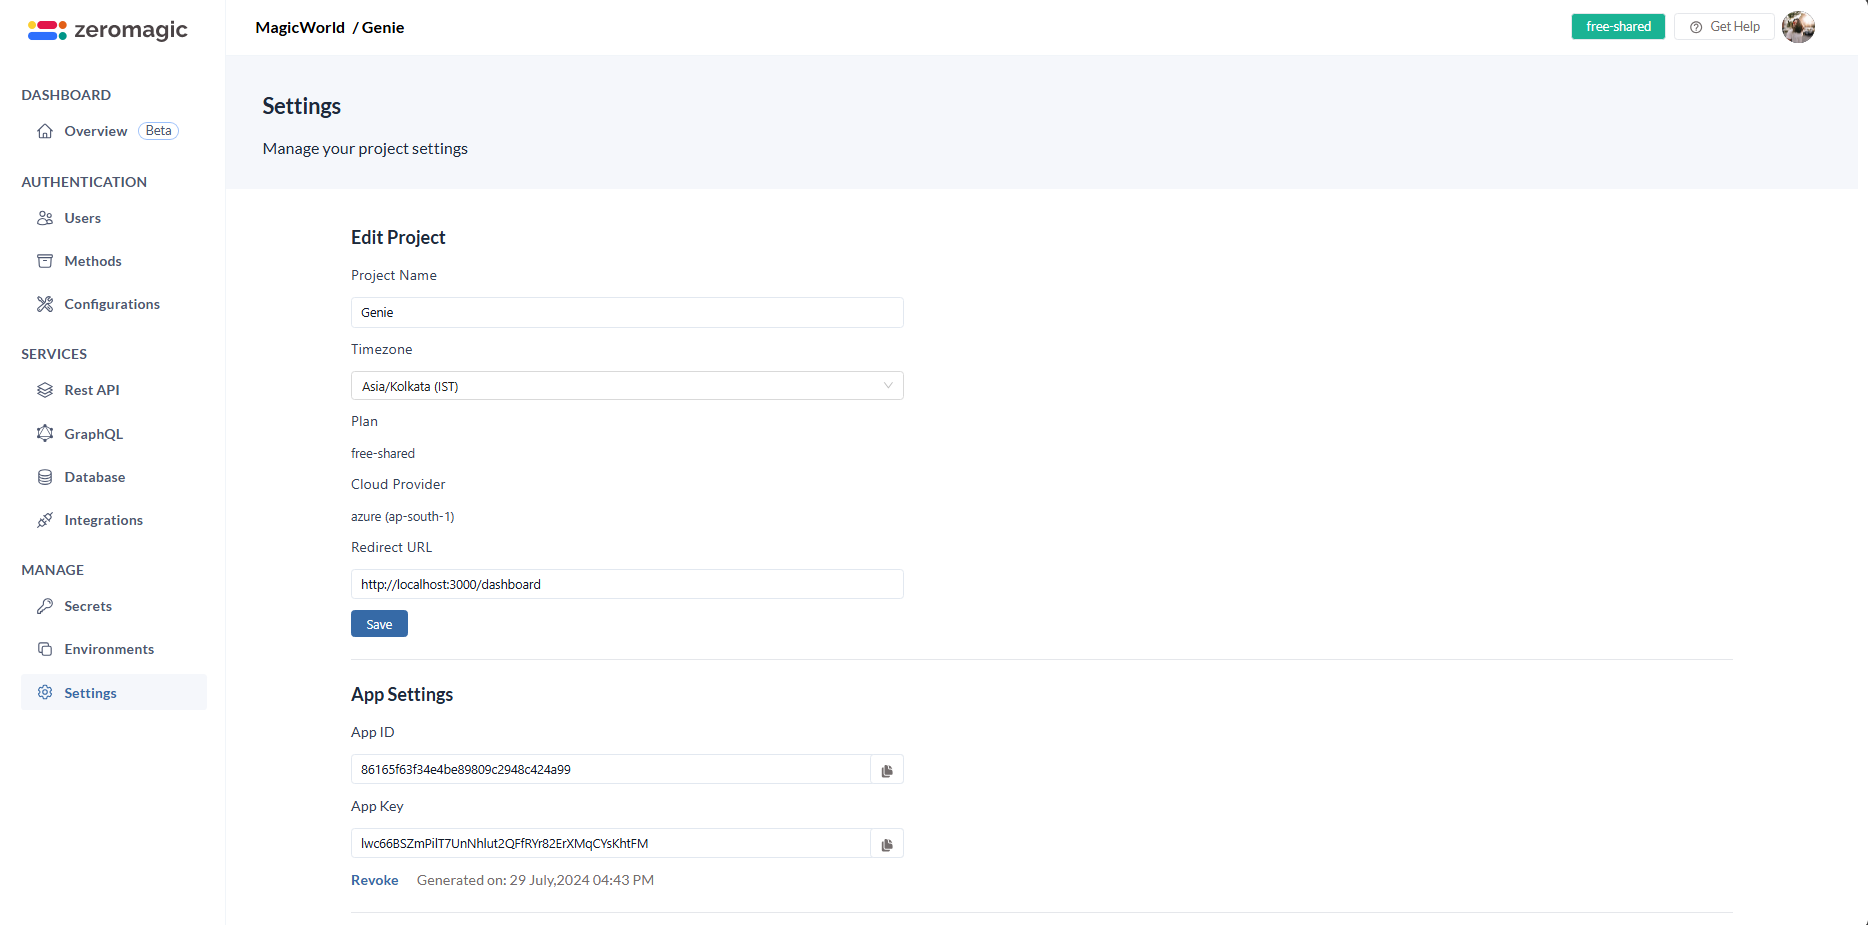
-
Now, go to
Environmentssections and select the environment you created. Copy theAuth Endpoint URLfrom the environment details. This is your authentication endpoint URL where you will be sending the APi requests. Your Auth endpoint URL looks similar to this: The oauth api endpath is /oauth and environment url http://authn.zeromagic.cloud/auth/86165f63f34e4be89809c2948c424a99/development/. So, the final URL will beOAuth Endpoint -
Before making the API request, let’s create a new user credentials in the database for this example. You can skip this step if your preferring to go with registering the user and login with that user credentials.
While using OAuth, if the email id is not found in the database, the user will be registered with the email id and the user will be logged in. If the email id is found in the database, the user will be logged in.
Step-3 : Create Login Page and Dashboard Page in ReactJS
Now,let’s create our simple frontend UI using ReactJS. We will create a login page where the user can click on the Google sign-in button and redirect them to the dashboard page after successful authentication.- Create a new React project using the following command.
- Add this dependency to your project using the following command:
-
Update
App.jswith the provided codeCreateApp.jslogin.jsfile andlogin.cssfile for the Login screen.Createdashboard.jsanddashboard.cssfile for the Dashboard screen.
Step-4 : Make the API Request
-
Replace the
{auth_base_url}/oauthin thelogin.jsfile with the copied URL from the environment details and with the path to the social google login endpoint. Here the{auth_base_url}ishttp://authn.zeromagic.cloud/auth/86165f63f34e4be89809c2948c424a99/development/Note: Replace the
auth_base_urlith your actual URL. The URL is followed by/oauthwhich is the path to the social google login endpoint. -
Replace the
{your_app_key}with your actualAPP-KEYin the headers oflogin.jsfile. You can find theAPP-KEYin theManage -> Settingssection of your console. Make sure to addconnection_nameasgooglein the body of the API request.login.js
Step-5 : Run the ReactJS Application
-
Run the react application using the following command:
-
Open your browser and navigate to
http://localhost:3000. You will see the login page with a Google sign-in button.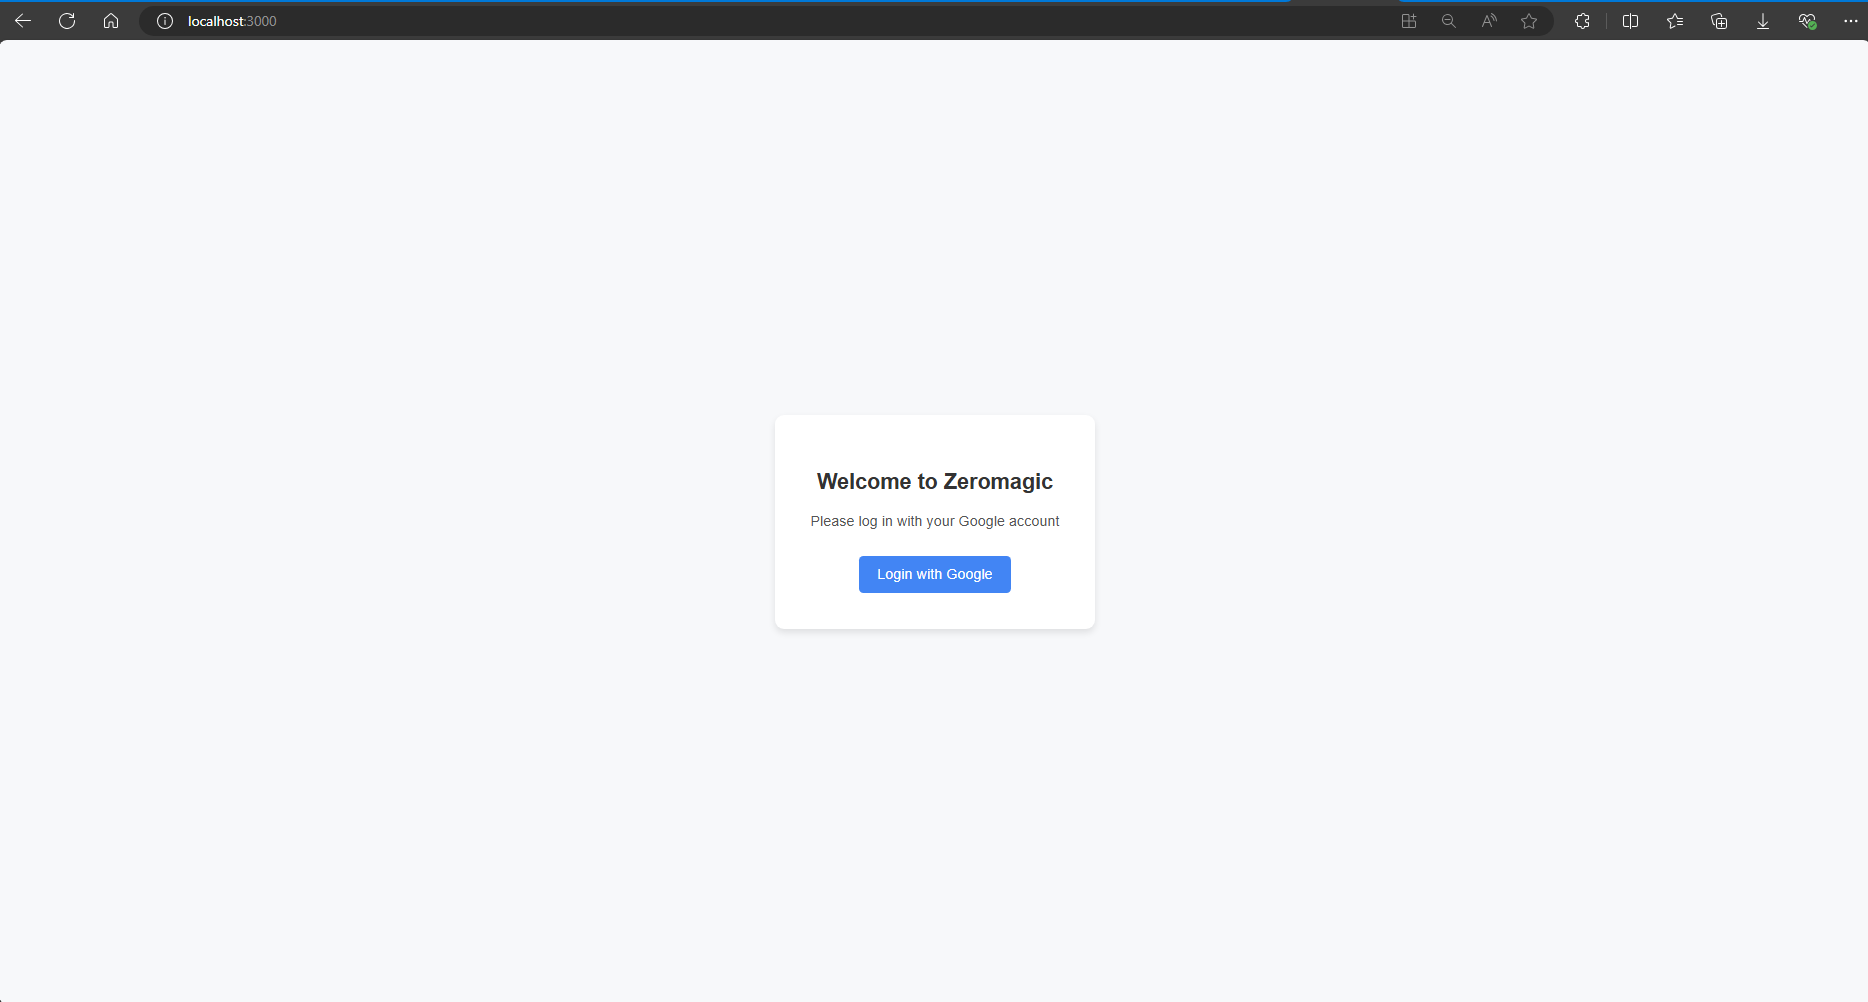
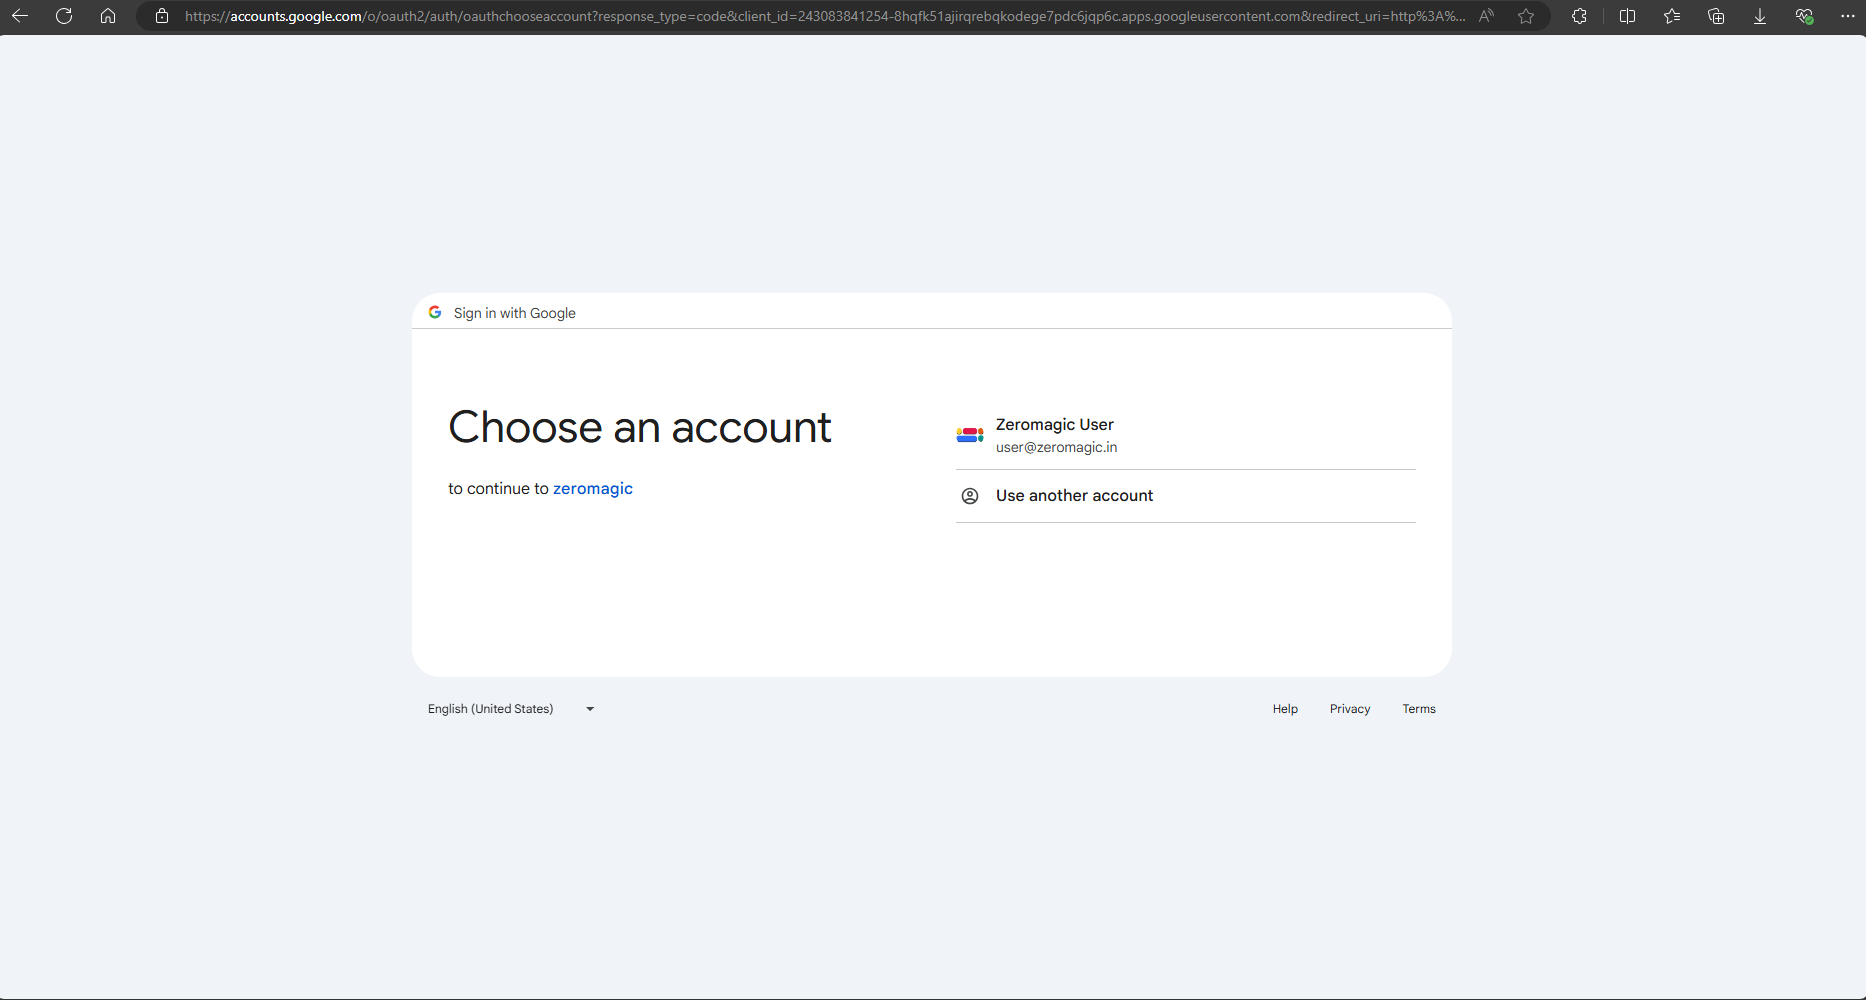
Login with Googlebutton. You will be redirected to the Google sign-in page. Sign in with your Google account.