> ## Documentation Index
> Fetch the complete documentation index at: https://nocode-docs.zeroagent.io/llms.txt
> Use this file to discover all available pages before exploring further.
# Quickstart
1. Within your Zeromagic project console, navigate to the `GraphQL` section. Click on the `Create GraphQL` button to create a GraphQL API instance for your application. This action will prompt a form to appear, allowing you to define the API details.
2. Provide a suitable name and API Route for the API that aligns with its functionality.
The URL for your GraphQL API will automatically include `graphql/` at the end. You don't need to specify this part in the configuration.
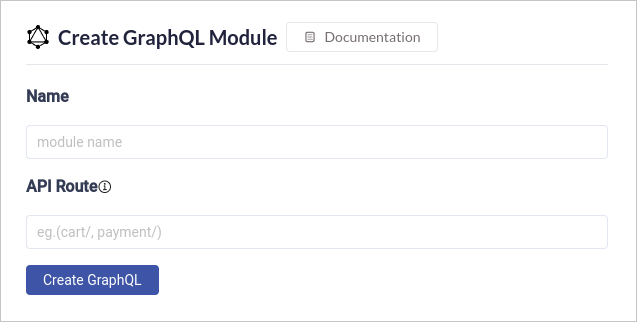 3. Click on the `Create GraphQL` button to generate the new API. Once API is created this will take you to the **GraphiQL** page.
# GraphiQL
Within your Zeromagic project console, navigate to the `GraphQL` section. Locate the specific GraphQL module you want to configure for your application. Clicking on it will take you to the GraphiQL page.This GraphiQL page is where you'll configure and manage your data [Dataconnectors](/graphql/quickstart/). These connectors act as bridges between your GraphQL endpoint and your actual data sources (databases, APIs, etc.).
3. Click on the `Create GraphQL` button to generate the new API. Once API is created this will take you to the **GraphiQL** page.
# GraphiQL
Within your Zeromagic project console, navigate to the `GraphQL` section. Locate the specific GraphQL module you want to configure for your application. Clicking on it will take you to the GraphiQL page.This GraphiQL page is where you'll configure and manage your data [Dataconnectors](/graphql/quickstart/). These connectors act as bridges between your GraphQL endpoint and your actual data sources (databases, APIs, etc.).