> ## Documentation Index
> Fetch the complete documentation index at: https://nocode-docs.zeroagent.io/llms.txt
> Use this file to discover all available pages before exploring further.
# Social
Social Connections are variety of built-in authentication methods that you can readily enable and configure. These methods offer secure and convenient ways for users to access your platform.
## Setup Client OAuth Redirect URI
You must add your **client application url in OAuth Redirect Uri** under projects settings in dashboard. This is the uri where your success response will be appended as query params and you can parse this response in your client application.
It is mandatory to add OAuth Redirect Uri for your social authentication method flow to work properly.
**Step-1 :** Open your **Project Settings** in your dashboard.
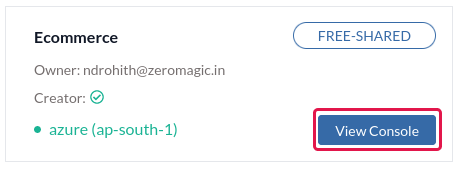 **Step-2 :** Add your Client Application Url in **OAuth Redirect Uri** under your project settings. Here we are adding `http://localhost:3000/dashboard` as our client application url. You can add your client application url endpoint path where you want to receive your success response.
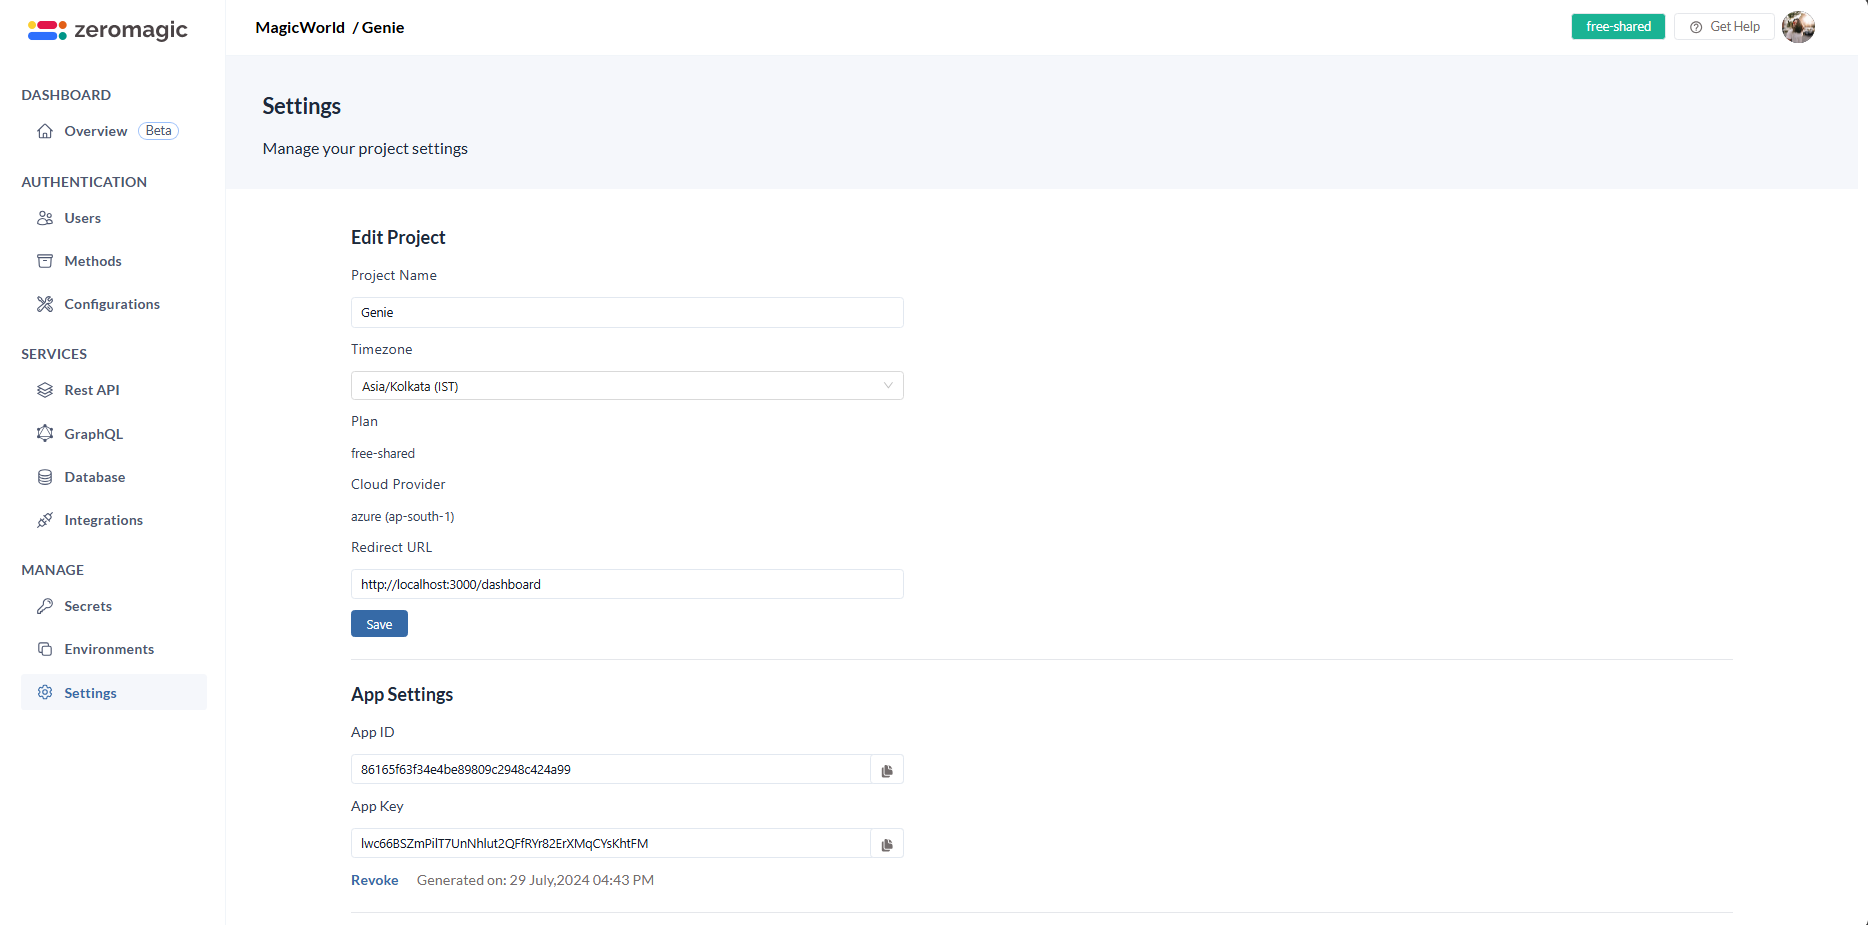 > Note : The access\_token and other user details will be appended as query params in your client application url. You can parse this response in your client application.
## Create Social Connection
You can start creating connection within just few clicks. Follow the steps below steps to start creating a connection.
### Connection 1: Google Auth
1. Go to the Google Developers Console and [Create a new project](https://console.cloud.google.com/projectcreate).
> Note : The access\_token and other user details will be appended as query params in your client application url. You can parse this response in your client application.
## Create Social Connection
You can start creating connection within just few clicks. Follow the steps below steps to start creating a connection.
### Connection 1: Google Auth
1. Go to the Google Developers Console and [Create a new project](https://console.cloud.google.com/projectcreate).
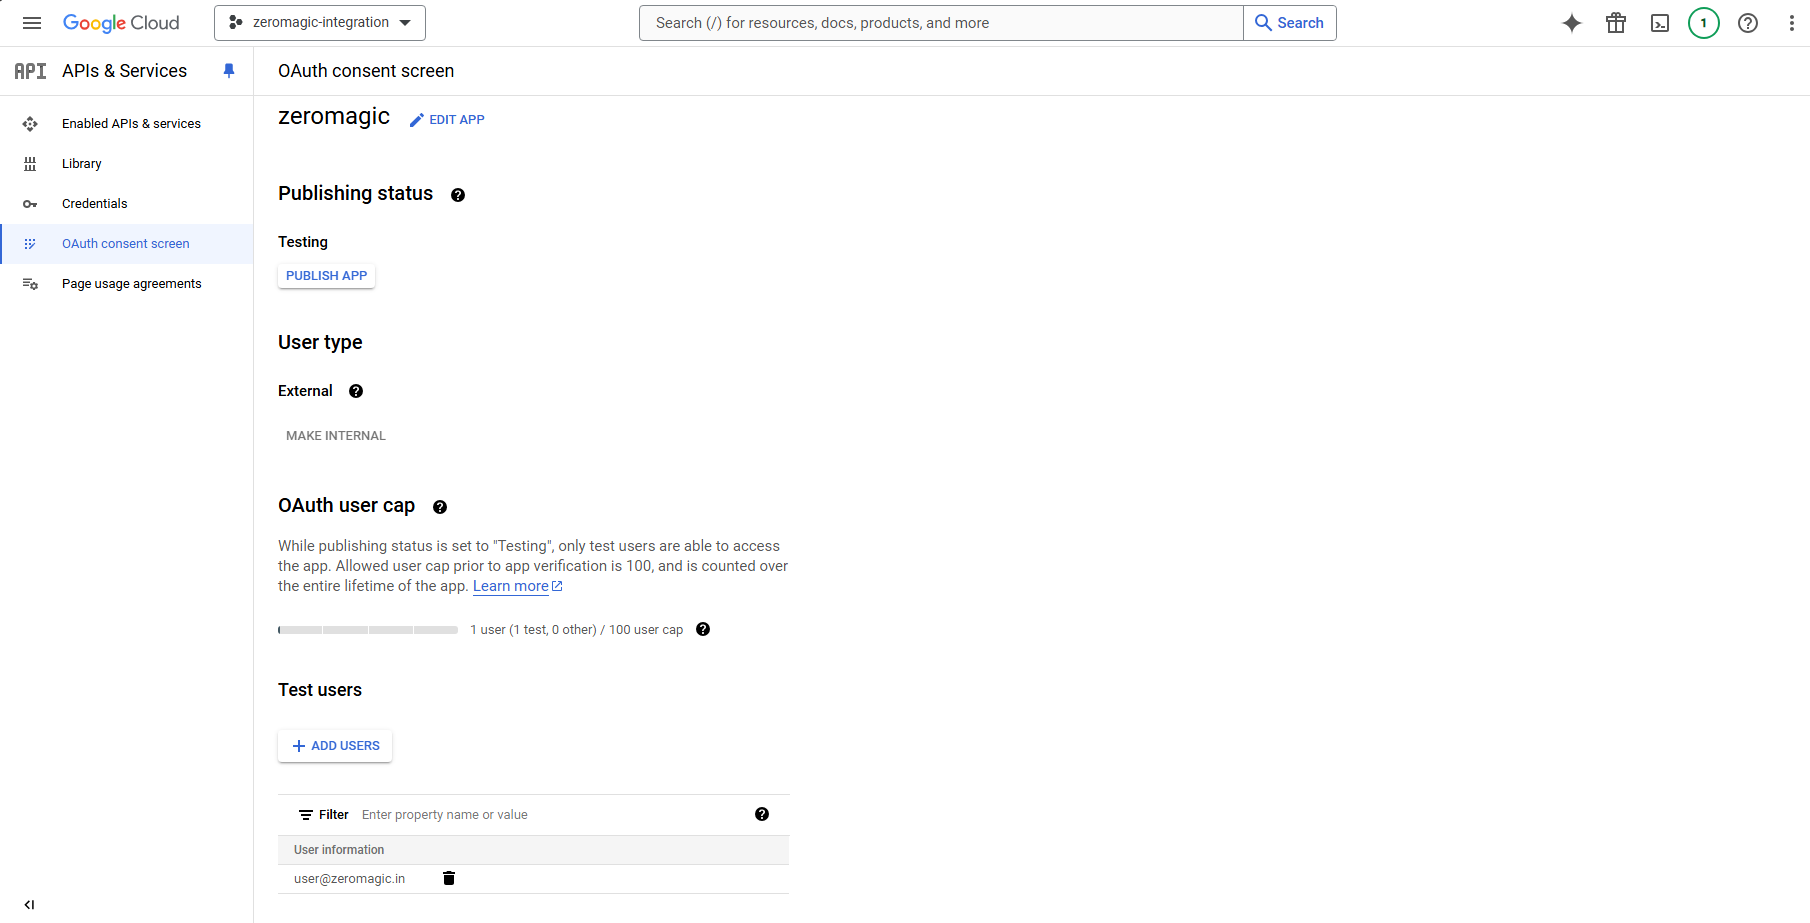
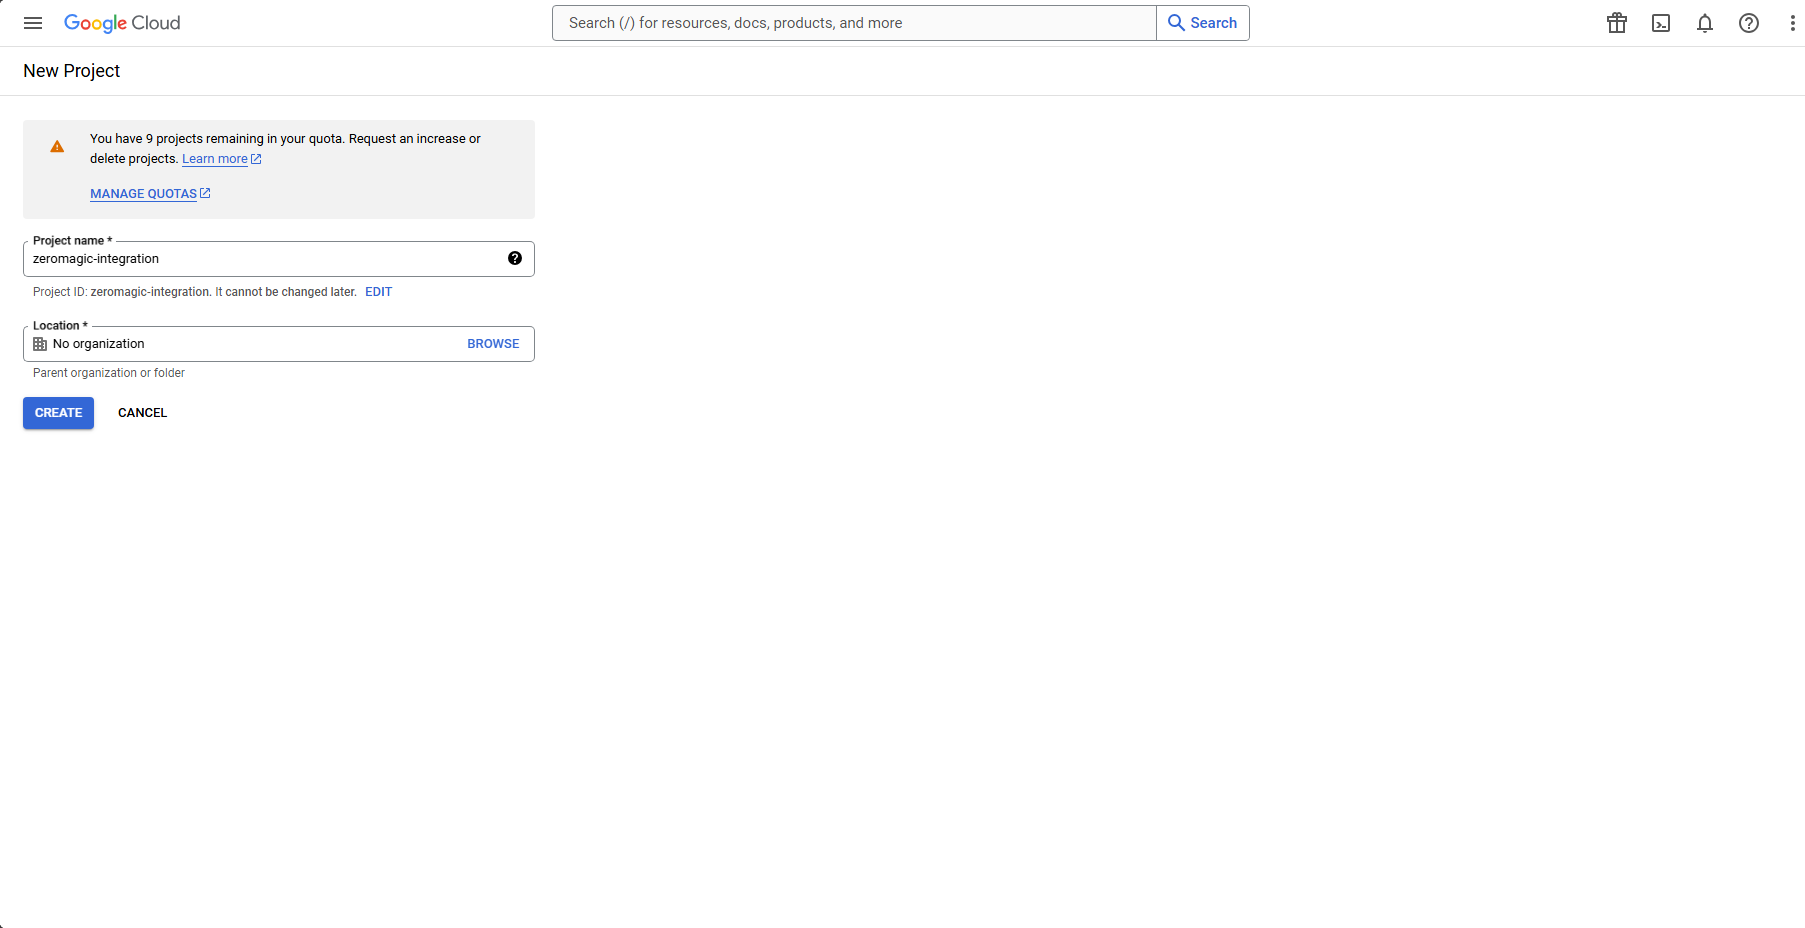 2. Click on the project name and then select `APIs & Services` on your left sidebar tab. Click on `OAuth consent screen` and fill in the required details.
 IMPORTANT
**Test users**: While your app is in development, you can add test users to your OAuth consent screen. **These users will be able to sign in to your app with their Google accounts** without needing to verify their identity. You can add test users by clicking on the `Add users` button in the OAuth consent screen configuration page.
> You will need to verify and move your app to production before it can be used by anyone other than the test users you have added.
IMPORTANT
**Test users**: While your app is in development, you can add test users to your OAuth consent screen. **These users will be able to sign in to your app with their Google accounts** without needing to verify their identity. You can add test users by clicking on the `Add users` button in the OAuth consent screen configuration page.
> You will need to verify and move your app to production before it can be used by anyone other than the test users you have added.
 3. Click on `Credentials` on your left sidebar tab and then click on `Create Credentials` and select `OAuth client ID`.
 SERVER CONFIGURATIONS
Application URL - [http://localhost:3000](http://localhost:3000)
> We are using `http://localhost:3000` as the frontend application URL in **Authorized origins**. You can replace it with your actual ReactJS application URL when rolling out to production. Example: `https://your-reactjs-app.com`
Oauth Callback or Authorized Redirect URI - [https://authn.zeromagic.cloud/oauth/callback/](https://authn.zeromagic.cloud/oauth/callback/)
4. Copy the `Client ID` and `Client Secret` and we will use this to setup our authentication in the zeromagic platform.
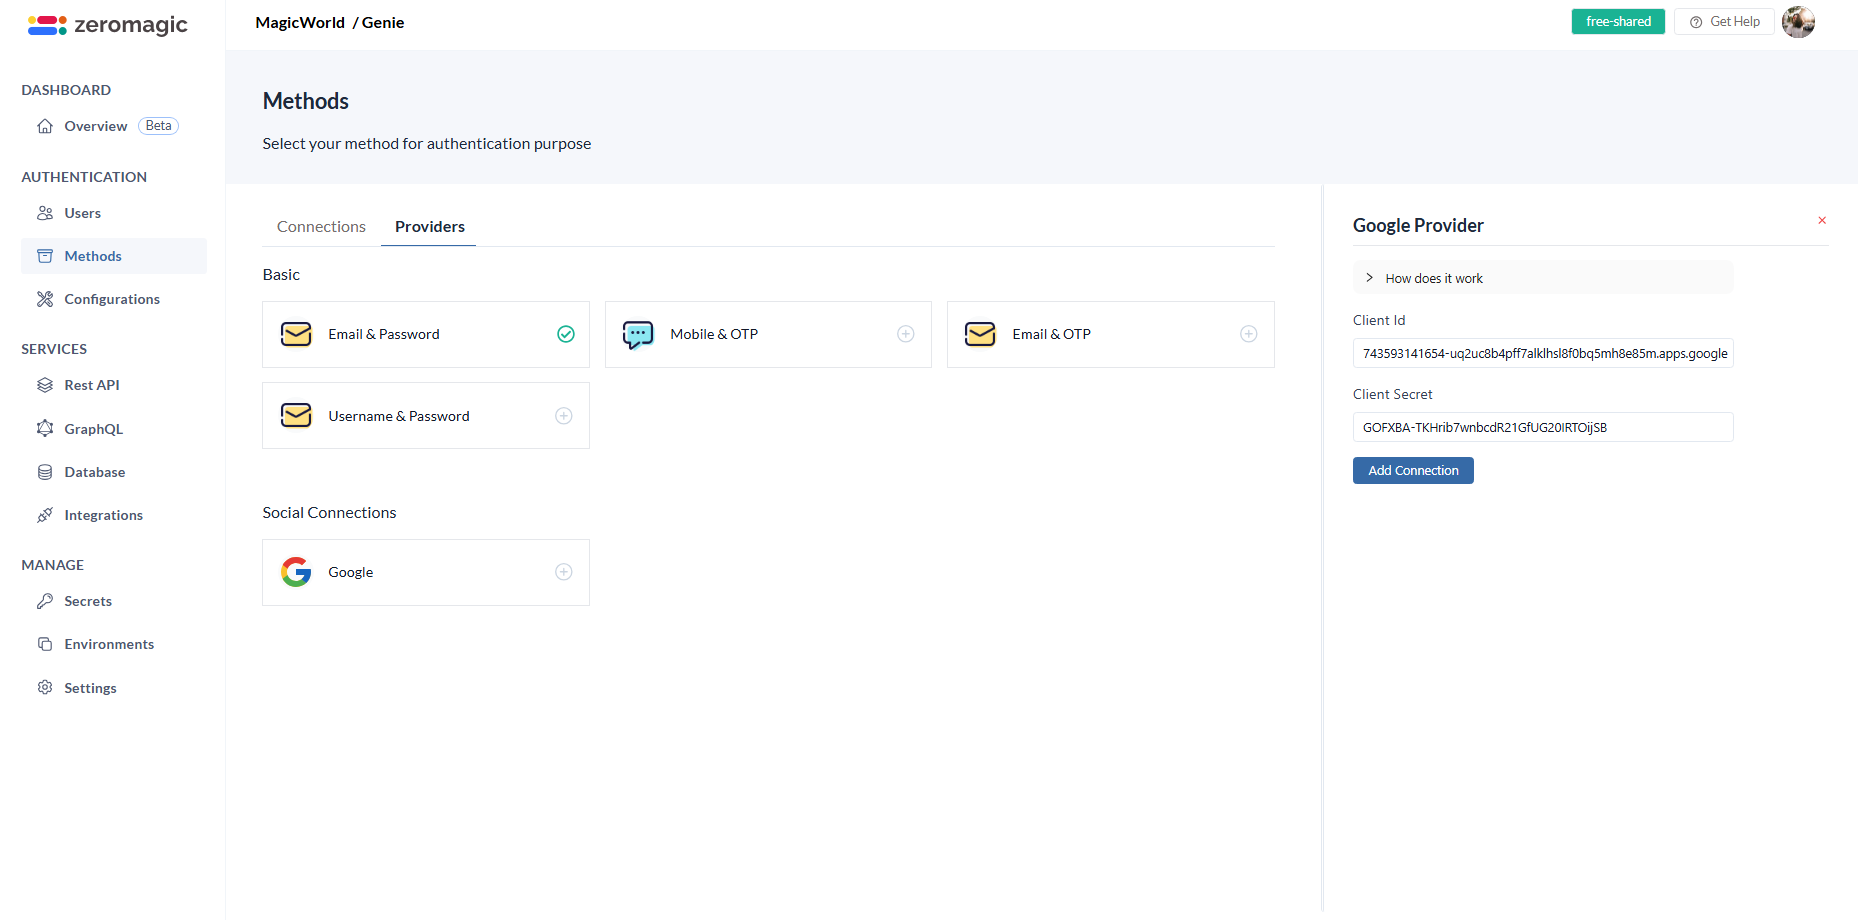
5. Add the `Google` authentication connection under Methods. Click `Add Connection` to create a new connection with the `Client ID` and `Client Secret` you copied from the Google Developers Console.
SERVER CONFIGURATIONS
Application URL - [http://localhost:3000](http://localhost:3000)
> We are using `http://localhost:3000` as the frontend application URL in **Authorized origins**. You can replace it with your actual ReactJS application URL when rolling out to production. Example: `https://your-reactjs-app.com`
Oauth Callback or Authorized Redirect URI - [https://authn.zeromagic.cloud/oauth/callback/](https://authn.zeromagic.cloud/oauth/callback/)
4. Copy the `Client ID` and `Client Secret` and we will use this to setup our authentication in the zeromagic platform.
5. Add the `Google` authentication connection under Methods. Click `Add Connection` to create a new connection with the `Client ID` and `Client Secret` you copied from the Google Developers Console.
 6. Now, go to `Environments` sections and select the environment you created. Copy the `Auth Endpoint URL` from the environment details. This is your authentication endpoint URL where you will be sending the APi requests. Your Auth endpoint URL looks similar to this:
The oauth api endpath is **/oauth** and environment url **[http://authn.zeromagic.cloud/auth/86165f63f34e4be89809c2948c424a99/development/](http://authn.zeromagic.cloud/auth/86165f63f34e4be89809c2948c424a99/development/)**. So, the final URL will be
```curl OAuth Endpoint theme={null}
http://authn.zeromagic.cloud/auth/86165f63f34e4be89809c2948c424a99/development/oauth
```
## Supported Social Providers
The list of supported social authentication methods
| Provider | Followed Protocol |
| ------------ | ----------------- |
| Google | OAuth2 |
## Oauth Callback URL
Make sure to configure the below given call back URL in the third party service
Callback url : `https://authn.zeromagic.cloud/oauth/callback/`
6. Now, go to `Environments` sections and select the environment you created. Copy the `Auth Endpoint URL` from the environment details. This is your authentication endpoint URL where you will be sending the APi requests. Your Auth endpoint URL looks similar to this:
The oauth api endpath is **/oauth** and environment url **[http://authn.zeromagic.cloud/auth/86165f63f34e4be89809c2948c424a99/development/](http://authn.zeromagic.cloud/auth/86165f63f34e4be89809c2948c424a99/development/)**. So, the final URL will be
```curl OAuth Endpoint theme={null}
http://authn.zeromagic.cloud/auth/86165f63f34e4be89809c2948c424a99/development/oauth
```
## Supported Social Providers
The list of supported social authentication methods
| Provider | Followed Protocol |
| ------------ | ----------------- |
| Google | OAuth2 |
## Oauth Callback URL
Make sure to configure the below given call back URL in the third party service
Callback url : `https://authn.zeromagic.cloud/oauth/callback/`